Payment Request Gateway Settings
To access the Payment Request Gateway Settings page, navigate to WooCommerce > Settings > Payments > Payment Request (Stripe) by Payment Plugins in your WordPress admin dashboard, or visit:
https://your-site.com/wp-admin/admin.php?page=wc-settings&tab=checkout§ion=stripe_payment_request
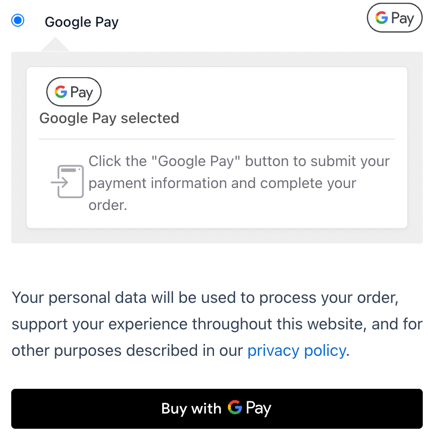
The Payment Request Gateway Settings page is where you configure browser-based payment methods for your WooCommerce store through Stripe. This gateway uses your customer's browser to render payment options like Google Pay, providing a streamlined checkout experience that leverages payment methods already saved in their browser or device.
Here you'll set up how browser payments appear across different sections of your store, customize button styles to match your brand, and configure payment processing options. The Payment Request Gateway offers a simpler alternative to dedicated payment method integrations while still providing fast, secure payment options for your customers.
The Payment Request Gateway supports Google Pay and we recommend this option if you want to offer Google Pay and want to avoid the Google Pay approval process. The main disadvantage is this Google Pay integration only works on Chrome, so it has more limited browser support compared to the dedicated Google Pay gateway.
Enabled
Controls whether browser payment methods are available as payment options on your store. When enabled, customers using compatible browsers will see payment request buttons (like Google Pay on Chrome) on the sections you've configured. When disabled, browser payment methods will not appear anywhere on your store regardless of other settings.
Default: Disabled
General Settings
Title
The name that customers see for the browser payment method during checkout. This appears as the payment option label and helps customers understand they can pay using their browser's saved payment methods. You can customize this to match your store's language or branding preferences, though "Browser Payments" clearly communicates the functionality.
Default: Browser Payments
Description
Additional text that appears below the browser payment method to provide customers with more information. This can include details about which browsers support the feature or instructions for first-time users. Leave this blank if you prefer a cleaner checkout experience without additional explanatory text.
Default: Empty (no description shown)
Show Payment Notice
When enabled, displays additional payment instructions in the payment method section of the checkout page. This notice helps educate customers about using browser payments and can improve conversion rates by addressing common questions or concerns about the payment method, especially since browser payment support varies by device and browser.
Default: Enabled
Credit Card Display
Controls how Payment Request transactions appear to customers on order confirmations, account pages, and subscription management. Since Payment Request uses tokenized payments through the browser, this setting determines the format used to identify the underlying payment method for record-keeping and future reference.
Default: Type ending in (displays as "Visa ending in 1234")
Charge Type
Determines when customer funds are collected from their Payment Request transaction. "Capture" immediately charges the customer when the order is placed, while "Authorize" only reserves the funds and requires manual capture later. Authorization is useful for custom products or when you need to verify inventory before charging customers.
Default: Capture
Payment Sections
Selects where Payment Request buttons appear throughout your store. You can enable browser payments on product pages for quick single-item purchases, cart pages for express cart checkout, mini cart widgets for immediate purchase from any page, and express checkout banners for prominent placement on the checkout page. Multiple sections can be selected to maximize customer convenience.
Default: Product Page, Cart Page
Order Status
Sets the WooCommerce order status after successful Payment Request processing. "Default" allows WooCommerce to automatically determine the appropriate status based on the products purchased (virtual/downloadable products become "Completed" while physical products become "Processing"). Custom statuses override this automatic behavior for specific business workflows.
Default: Default
Button Settings
Type
Determines the context and styling of the Payment Request button across your store. The button type affects both the visual appearance and the message conveyed to customers.
Options:
- Default - Provides a neutral payment button that works in most situations

- Buy - Uses more direct purchase language that can be effective on product pages and cart areas

Default: Buy
Theme
Controls the color scheme and visual style of Payment Request buttons throughout your store. Choose the theme that best complements your site's overall design.
Options:
- Dark - Provides high contrast and works well on light backgrounds
- Light - Blends with darker backgrounds
- Light-outline - Offers a subtle bordered design that works across various background colors
Default: Dark
Height
Sets the height of Payment Request buttons in pixels. This allows you to match the button size to your site's design and ensure consistency with other checkout elements. The maximum height is 64 pixels, which provides good visibility while maintaining a proportional appearance with other page elements.
Default: 40 pixels
Browser Compatibility
The Payment Request Gateway relies on browser support for payment request APIs, which means availability varies by browser and operating system. Chrome provides the most comprehensive support, including Google Pay integration, while other browsers may have limited functionality.
The gateway automatically detects available payment methods and only displays options that the customer's browser supports.
Troubleshooting
If Payment Request buttons are not appearing on your store, the most common cause is browser compatibility. The Payment Request API is not supported by all browsers, and even supported browsers may not show payment options if the customer hasn't saved any payment methods.
To test functionality, use Chrome with a saved payment method in your Google account. The buttons will only appear when the browser detects available payment methods that can be used with the current site.