Webhooks
Webhooks are communication channels that allow Stripe to instantly notify your WooCommerce store when important events occur in your Stripe account. Instead of your website constantly checking Stripe for updates, webhooks push notifications directly to your store the moment something happens – like when a payment completes, fails, or gets refunded.
Think of webhooks as a direct phone line between Stripe and your store. When a customer's payment succeeds, Stripe immediately calls your website with that information, allowing your store to update the order status in real-time. This ensures customers see accurate order information and reduces delays in order processing.
The Stripe plugin automatically creates webhooks when using oAuth (the "Connect to Stripe" button), so most users won't need to manually configure them. However, if you're manually entering API keys or need to troubleshoot webhook issues, this guide will walk you through the process.
How the Plugin Uses Webhooks
The Payment Plugins for Stripe WooCommerce plugin listens for specific Stripe events to keep your WooCommerce orders synchronized with your Stripe account. When these events occur, Stripe sends the event data to your webhook endpoint, and the plugin processes the information to update order statuses, handle failed payments, manage disputes, and process refunds automatically.
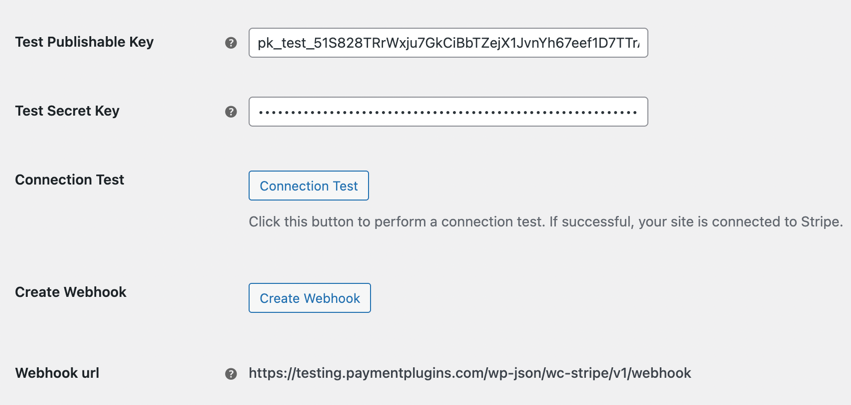
Your site's webhook URL follows the format https://your-site.com/wp-json/wc-stripe/v1/webhook. You can copy this exact URL from the API Settings page if you need to create webhooks manually or verify your webhook configuration in the Stripe Dashboard.
The plugin monitors these essential Stripe events:
- charge.succeeded - Confirms successful payments
- charge.failed - Handles payment failures
- charge.pending - Manages pending payment states
- payment_intent.succeeded - Processes completed payment intents
- payment_intent.requires_action - Handles payments requiring additional authentication
- charge.refunded - Ensures refunds created in Stripe Dashboard are reflected in WooCommerce
- charge.dispute.created - Alerts when disputes are opened
- charge.dispute.closed - Updates when disputes are resolved
- review.opened - Notifies when Stripe flags transactions for review
- review.closed - Updates when reviews are completed
Manual Webhook Creation
Webhooks are automatically created when using oAuth (the "Connect to Stripe" button on the API Settings page). However, if you're manually entering API keys, you can use the "Create Webhook" button on the API Settings page to automatically create webhooks, or you can create them manually in your Stripe Dashboard.
Using the API Settings Create Webhook Button
The simplest method for creating webhooks when manually entering API keys is to use the "Create Webhook" button located on the API Settings page. After entering your API keys and saving the settings, click this button to automatically create the webhook with all the necessary events and configuration.
Creating Webhooks in Stripe Dashboard
If you prefer to create webhooks directly in your Stripe Dashboard or need to troubleshoot webhook delivery issues, you can create them manually.
To create a webhook manually in your Stripe Dashboard:
- Navigate to the Stripe Dashboard and log into your account
- In the left sidebar, click on Developers to expand the developer tools section
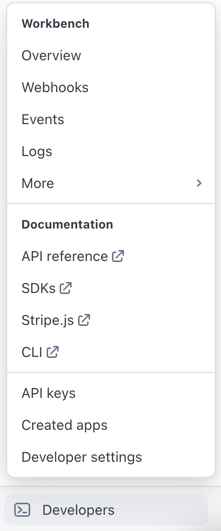
- Click Webhooks to access the webhook management area
- Click the + Add destination button in the upper right corner

Selecting Events
On the "Select events" page, choose Your account to receive events from resources in your account. In the Events section, you can either select "All events" or choose "Selected events" and manually add the specific events listed above that the plugin requires.
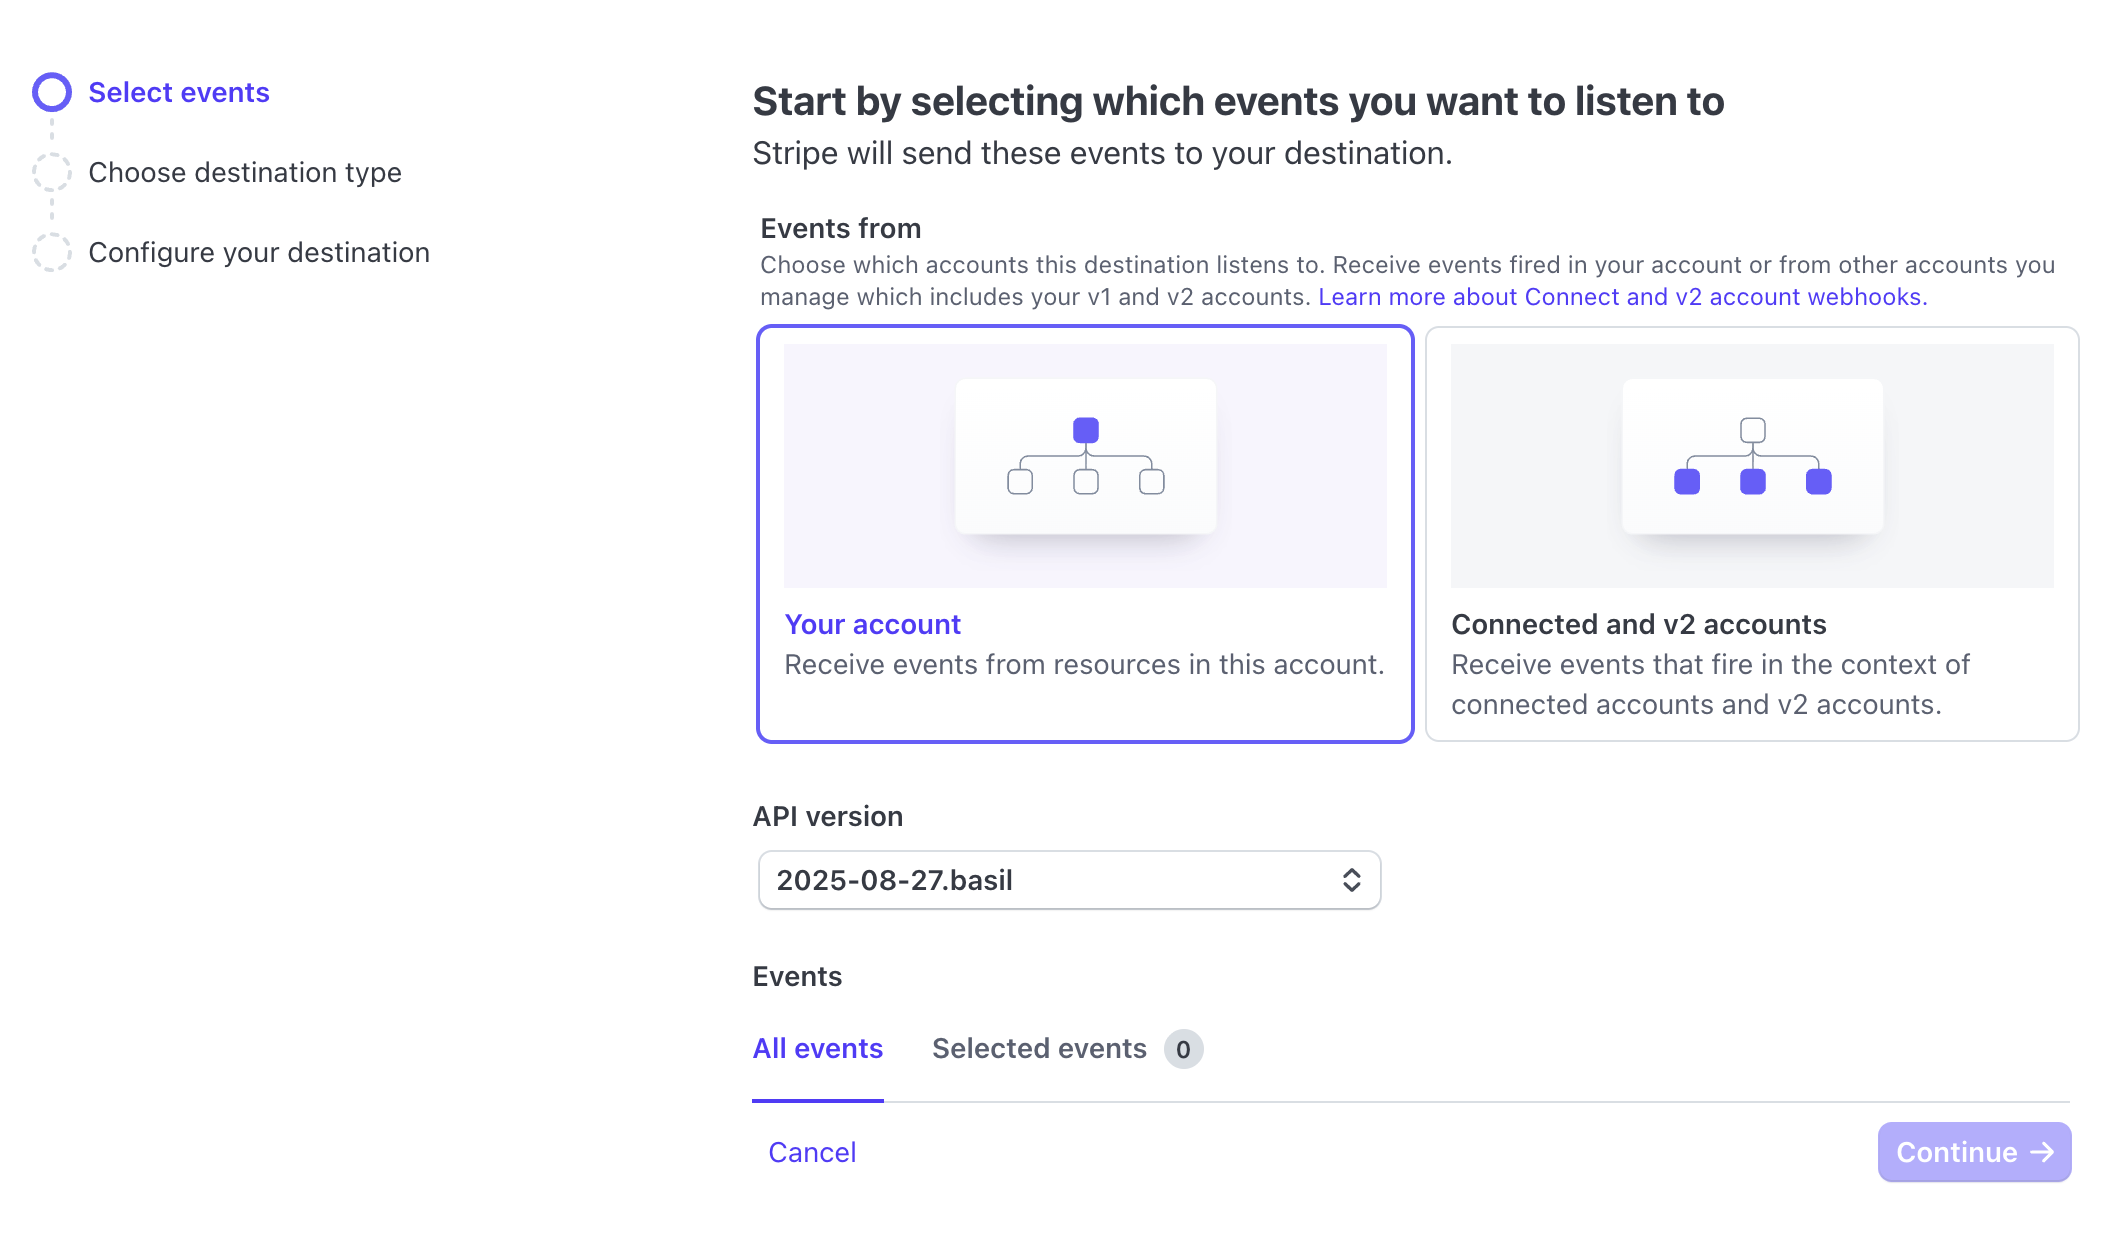
For the API version, select the most recent version available (the plugin is compatible with all current Stripe API versions).
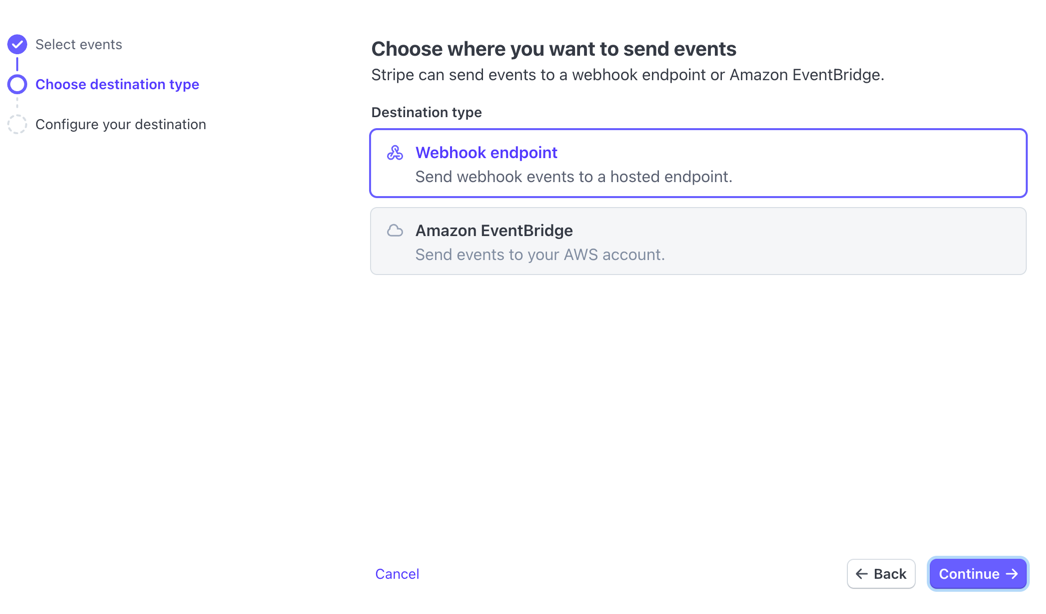
Choosing Destination Type
On the "Choose destination type" page, select Webhook endpoint to send webhook events to your hosted WooCommerce site. This is the standard option for WordPress/WooCommerce integrations.
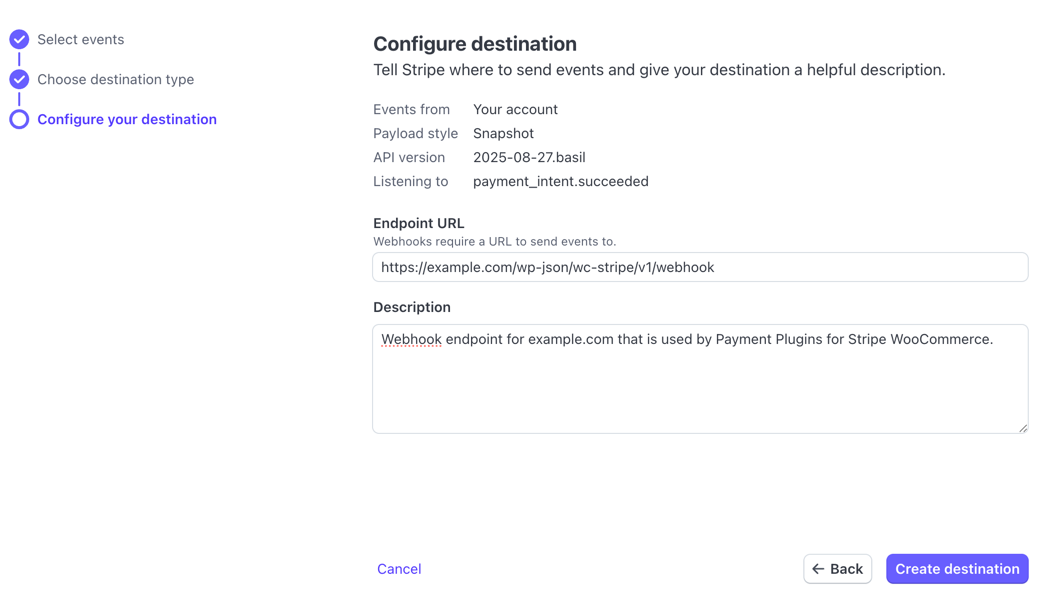
Configuring Your Destination
On the final "Configure destination" page:
- Endpoint URL: Enter your site's webhook URL, which you can copy from the API Settings page in your WordPress admin. It should look like
https://your-site.com/wp-json/wc-stripe/v1/webhook - Description: Add a helpful description like "Webhook endpoint for [your-site.com] used by Payment Plugins for Stripe WooCommerce"
- Click Create destination to complete the setup
Adding the Webhook Secret
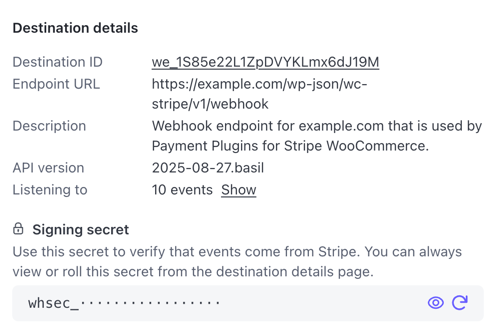
After creating the webhook, Stripe will generate a webhook secret that appears in your webhook configuration. This secret is crucial for security – it allows the plugin to verify that webhook notifications are genuinely from Stripe and not from malicious sources.
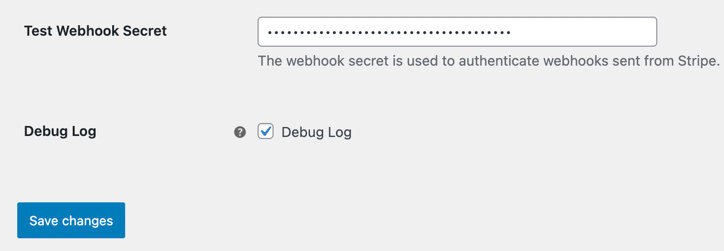
Copy the webhook secret from your Stripe Dashboard and paste it into the Test Webhook Secret or Live Webhook Secret field on the API Settings page, depending on whether you're working in the Stripe test or live environment. The webhook secret is required for the plugin to process webhook events, so this step is essential for proper functionality.
Testing Your Webhook
Once you've created your webhook and added the secret to your plugin settings, you can test the connection by processing a test payment in your Stripe environment. Check your WooCommerce logs (WooCommerce > Status > Logs) for webhook-related entries under the log file name wc-stripe to confirm that events are being received and processed correctly.
Common Webhook Issues
Even with proper setup, webhooks can sometimes encounter delivery problems. Understanding the most common issues can help you quickly diagnose and resolve webhook failures.
Third-Party Authentication Plugin Conflicts
The most common reason webhooks fail is due to third-party authentication plugins that restrict access to the WordPress REST API. Since the Stripe plugin uses WordPress REST API endpoints for webhook processing, authentication plugins that block or modify REST API access can prevent webhooks from being delivered successfully.
If you're using authentication plugins, security plugins, or access control plugins, check their settings to ensure they allow REST API access to the webhook endpoint URL. You may need to whitelist the webhook endpoint or configure the plugin to allow unauthenticated access to Stripe webhook URLs.
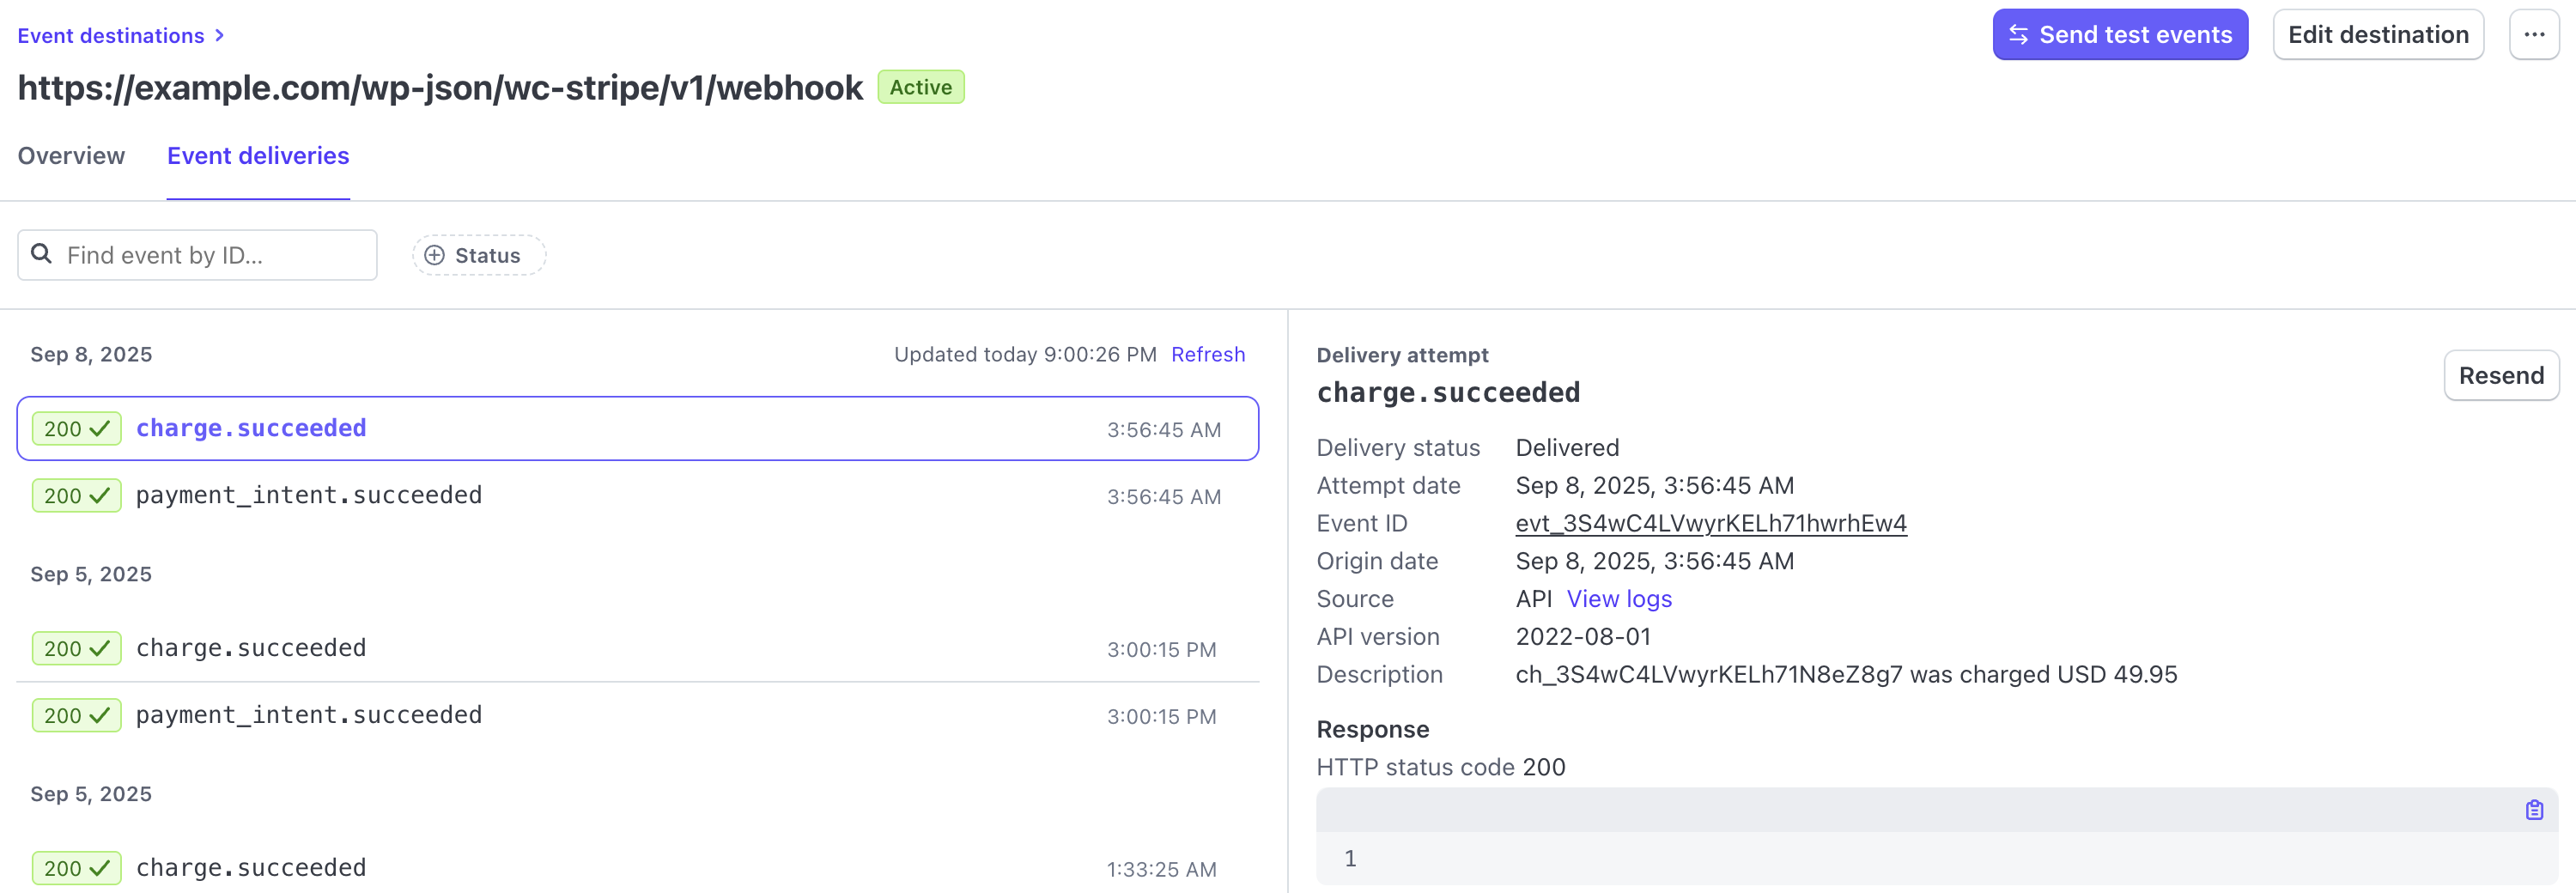
Monitoring Webhook Deliveries
You can review webhook delivery status and troubleshoot issues directly in your Stripe Dashboard:
- Navigate to Developers > Webhooks in your Stripe Dashboard
- Click on your webhook endpoint to view its details
- Click the Event deliveries tab to see a list of all webhook attempts
This view shows both successful (HTTP 200) and failed webhook deliveries, along with timestamps and response details. Failed deliveries will show error codes and messages that can help you identify the specific issue.
Incorrect Webhook Secret
The second most common webhook issue is an incorrect or missing webhook secret. When the webhook secret doesn't match between your Stripe Dashboard and plugin settings, you'll see authentication errors in the webhook delivery logs.
The error message for webhook secret issues typically looks like this:
{
  "code": "webhook-error",
  "message": "Invalid signature received. Verify that your webhook secret is correct.",
  "data": {
    "status": 401
  }
}

To resolve this issue, copy the webhook secret from your Stripe Dashboard webhook settings and paste it into the appropriate webhook secret field (Test or Live) on your plugin's API Settings page. Ensure there are no extra spaces or characters when copying the secret.
If you encounter issues with webhook delivery, verify that your webhook URL is accessible from the internet and that your site's SSL certificate is valid, as Stripe requires HTTPS endpoints for webhook delivery. You can also enable detailed webhook debugging in the plugin's API Settings to capture more information about webhook processing in your WooCommerce logs.
Support Topics
For additional examples and community solutions to common webhook issues, you can reference these WordPress.org support topics:
Webhook fails delivery every time
Issue: User experiencing webhook failures with 403 error and "Invalid encoding: ISO-8859-1" message. Despite trying various troubleshooting steps including disabling plugins, changing themes, recreating webhooks, and whitelisting Stripe IPs in security plugins, all webhook deliveries continued to fail.
Resolution: The issue was resolved when the user discovered they had configured server-level security rules (htaccess) that blocked visitors from all countries except the UK. This was preventing webhook deliveries from Stripe's US-based IP addresses. Adding the US to the allowed countries list in their server configuration fixed the webhook delivery issues.
Key Takeaway: Server-level geographic restrictions and firewall rules can block webhook deliveries even when WordPress-level security plugins are properly configured. Always check hosting provider and server-level security settings when troubleshooting webhook failures.
Webhook 401: The REST API has been restricted to authenticated users
Issue: User receiving 401 errors with the message "The REST API has been restricted to authenticated users" despite whitelisting Stripe IPs in Cloudflare, Wordfence, and other security plugins.
Resolution: The issue was identified as a plugin that blocks WordPress REST API access for unauthenticated requests. The solution was to locate the plugin causing the restriction and whitelist the specific webhook route /wp-json/wc-stripe/v1/webhook in the plugin's exclusion settings.
Key Takeaway: Security plugins that restrict REST API access are a common cause of webhook failures. The issue isn't usually with IP-based security but with authentication requirements for REST API endpoints. Look for plugins that specifically block REST API access and ensure webhook endpoints are whitelisted.