Apple Pay Settings
To access the Apple Pay Settings page, navigate to WooCommerce > Settings > Payments > Apple Pay (Stripe) by Payment Plugins in your WordPress admin dashboard, or visit:
https://your-site.com/wp-admin/admin.php?page=wc-settings&tab=checkout§ion=stripe_applepay
The Apple Pay Settings page is where you configure Apple Pay payments for your WooCommerce store through Stripe. Apple Pay provides customers with a fast, secure way to complete purchases using Touch ID, Face ID, or their device passcode, eliminating the need to manually enter payment and shipping information.
Here you'll set up Apple Pay's appearance across different sections of your store, customize button styles to match your brand, and configure how Apple Pay processes payments. The plugin provides a convenient "Register Domain" button that automates the domain registration process with Apple, making setup simple and straightforward.
Domain Registration
Before Apple Pay can be used on your store, your domain must be registered with Apple through Stripe. The plugin provides a convenient "Register Domain" button that handles this process automatically by adding the required domain association file to your server and completing the registration with Apple's systems.
If automatic registration fails due to file permissions, you'll need to manually download the apple-developer-merchantid-domain-association file from Stripe and place it in your site's .well-known directory, then register your domain in the Stripe Dashboard.
Enabled
Controls whether Apple Pay is available as a payment option on your store. When enabled, customers using compatible Apple devices will see Apple Pay buttons on the sections you've configured (product pages, cart, checkout, etc.). When disabled, Apple Pay will not appear anywhere on your store regardless of other settings.
Default: Disabled
General Settings
Title
The name that customers see for the Apple Pay payment method. This appears as the payment option label during checkout and helps customers understand they can pay using their Apple device's secure authentication. You can customize this to match your store's language or branding preferences.
Default: Apple Pay
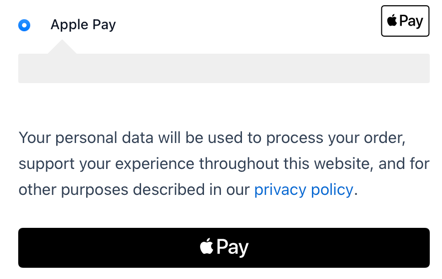
The title of "Apple Pay" is displayed
Description
Additional text that appears below the Apple Pay payment method to provide customers with more information. This can include details about the security benefits of Apple Pay or instructions for first-time users. Leave this blank if you prefer a cleaner checkout experience without additional explanatory text.
Default: Empty (no description shown)
Enable On All Browsers
When enabled, Apple Pay will be available on all supported browsers, not just Safari. When disabled, Apple Pay is restricted to Safari only.
Default: Enabled
Credit Card Display
Controls how Apple Pay transactions appear to customers on order confirmations, account pages, and subscription management. Since Apple Pay uses tokenized payments, this setting determines the format used to identify the underlying payment method for record-keeping and future reference.
Default: Type ending in (displays as "Visa ending in 1234")
Charge Type
Determines when customer funds are collected from their Apple Pay transaction. "Capture" immediately charges the customer when the order is placed, while "Authorize" only reserves the funds and requires manual capture later. Authorization is useful for custom products or when you need to verify inventory before charging customers.
Default: Capture
Payment Sections
Controls where Apple Pay buttons appear across your store. Multiple sections can be selected.
- Checkout: Displays Apple Pay in the payment methods section of the checkout page.
- Product Page: Displays an Apple Pay button on individual product pages for quick single-item purchases.
- Cart Page: Displays an Apple Pay button on the cart page for express checkout.
- Mini Cart: Displays an Apple Pay button in the mini cart widget.
- Express Checkout: Displays Apple Pay in the express checkout row at the top of the checkout page.
Default: Checkout, Product Page, Cart Page

If using the checkout block, make sure you enabled "Express Checkout" so that Apple Pay is available
Order Status
Sets the WooCommerce order status after successful Apple Pay payment processing. "Default" allows WooCommerce to automatically determine the appropriate status based on the products purchased (virtual/downloadable products become "Completed" while physical products become "Processing"). Custom statuses override this automatic behavior for specific business workflows.
Default: Default
Button Settings
Button Style
Controls the visual appearance of all Apple Pay buttons throughout your store.
- Black Button: A black button — works well on light backgrounds.
- White With Black Line: A white button with a black border — versatile across different background colors.
- White Button: A plain white button — suits light-colored or minimal designs.
Default: Black Button

Default button style

White with black outline style
Button Height
Sets the height of the Apple Pay button in pixels. Must be between 40 and 55 pixels.
Default: 50
Button Radius
Sets the border radius of the Apple Pay button in pixels, controlling how rounded the button corners appear. A value of 0 produces square corners; higher values produce progressively rounder corners.
Default: 4
Checkout Button Type
Determines the text and icon displayed on Apple Pay buttons specifically on the checkout page. "Standard Button" shows just the Apple Pay logo, "Buy with Apple Pay" includes purchase-focused text, and "Checkout with Apple Pay" emphasizes the checkout process. Choose the option that best matches your checkout page's flow and terminology.
Default: Standard Button
Buy with Apple Pay

Checkout with Apple Pay

Cart Button Type
Controls the text and icon displayed on Apple Pay buttons on cart pages and mini cart widgets. "Standard Button" shows just the Apple Pay logo, "Buy with Apple Pay" includes purchase-focused text, and "Checkout with Apple Pay" emphasizes moving to checkout. Consider your customers' expectations when they're viewing their cart contents.
Default: Standard Button
Product Button Type
Determines the text and icon displayed on Apple Pay buttons on individual product pages. "Standard Button" shows just the Apple Pay logo, "Buy with Apple Pay" encourages immediate purchase, and "Checkout with Apple Pay" suggests proceeding to checkout. Product pages typically benefit from more direct purchase language.
Default: Buy with Apple Pay
Troubleshooting
If Apple Pay is not appearing on your store, here are the most common issues and solutions:
Valid Payment Method in Apple Wallet
Ensure the device you're testing with has at least one valid payment method saved in Apple Wallet. This could be a credit card, debit card, or bank account that has been properly verified and added to the Wallet app.
Domain Registration Status
Verify that your domain registration with Apple was successful. You can check this by clicking the "Register Domain" button on the API Settings page - if registration was successful, you should see a confirmation message.
Verify Domain Association File
For advanced troubleshooting, you can manually check that the Apple domain association file is properly accessible. Navigate to https://your-site.com/.well-known/apple-developer-merchantid-domain-association in your browser. The file should load and display text content similar to the following:

If the file doesn't load or shows an error, the most common cause is that your web server (like Nginx) isn't configured to serve the file as plain text. You may need to add configuration to your web server to properly serve files in the .well-known directory. For Nginx, you can add:
location /.well-known {
        allow all;
        default_type text/plain;
    }
For more detailed information about domain registration issues, see these WordPress support threads: