Connect Your PayPal Account
Before you can accept your first payment through your WooCommerce store, you need to establish a secure connection between your website and your PayPal account. This connection is what allows PayPal to process payments on your behalf and ensures that funds from customer purchases are deposited into your PayPal account. Without this connection, the Payment Plugins for PayPal WooCommerce plugin remains inactive—installed but unable to function.
The connection works by creating a secure communication channel between your WooCommerce store and PayPal's payment processing system. When a customer makes a purchase, your website can securely communicate with PayPal to process the payment, verify the transaction, and confirm the order. This all happens behind the scenes, providing a smooth checkout experience for your customers while keeping their payment information secure.
You have two ways to establish this connection: the Connect process, which is the recommended and easier method that simply requires you to log into your PayPal account, or the manual process, which involves creating API credentials through PayPal's Developer portal. We'll walk you through both methods so you can choose the approach that works best for your situation.
Using the Connect process (Recommended)
The Connect process is the fastest and most straightforward way to link your PayPal account to your WooCommerce store. This method handles all the technical setup automatically, including creating the necessary API credentials and webhooks behind the scenes. You simply log into your PayPal account, and the plugin takes care of the rest.
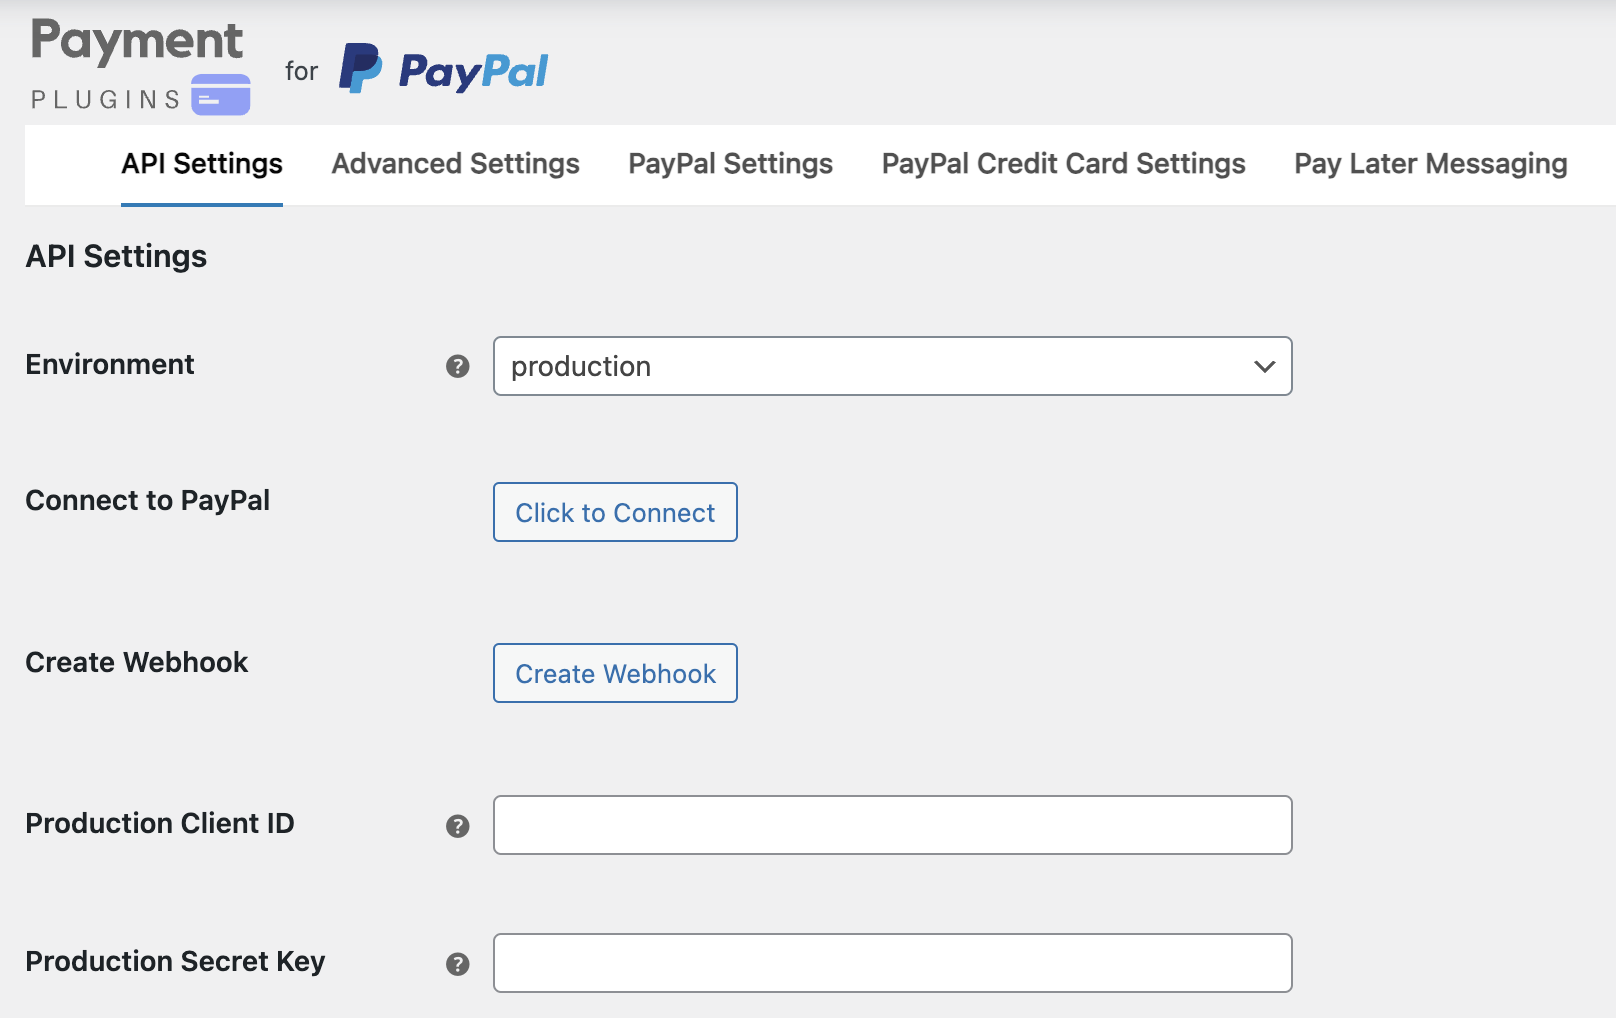
Step 1: Access the API Settings
Navigate to your WordPress admin area and go to WooCommerce > PayPal by Payment Plugins > Settings. This will open the plugin's configuration page with several tabs at the top. Make sure you're on the API Settings tab, which should be selected by default.
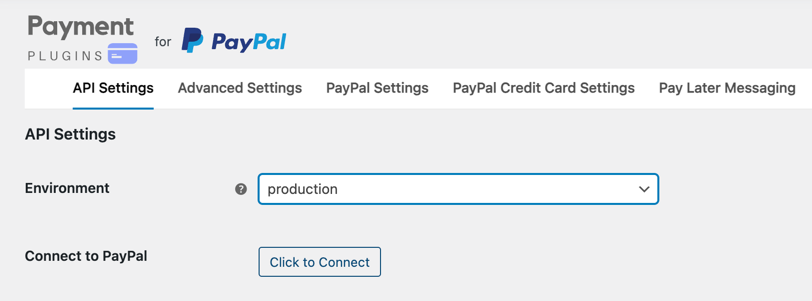
Step 2: Choose your environment and initiate the connection
On the API Settings page, you'll see an Environment dropdown. Make sure production is selected if you want to accept real payments from customers. Under the "Connect to PayPal" section, click the Click to Connect button to begin the authentication process.
The Connect process works for both production and sandbox environments. If you're testing your setup, simply select "sandbox" from the Environment dropdown instead of "production." The connection steps remain the same for both environments.
Step 3: Complete the PayPal authentication
Clicking the Connect button launches a PayPal authentication popup window. You'll be prompted to enter your business account email address. PayPal will then check if this email is associated with an existing account:
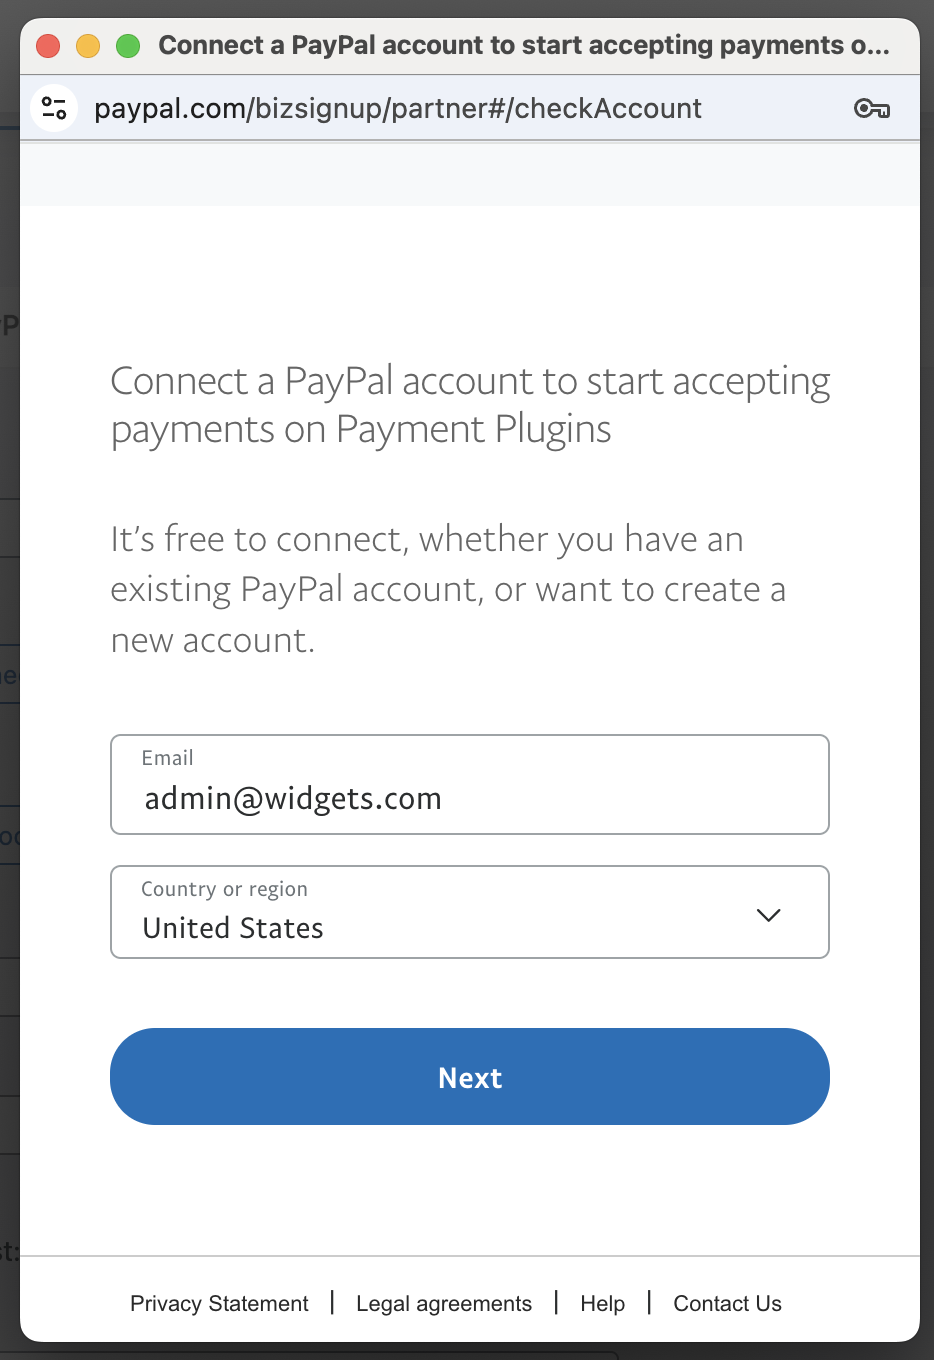
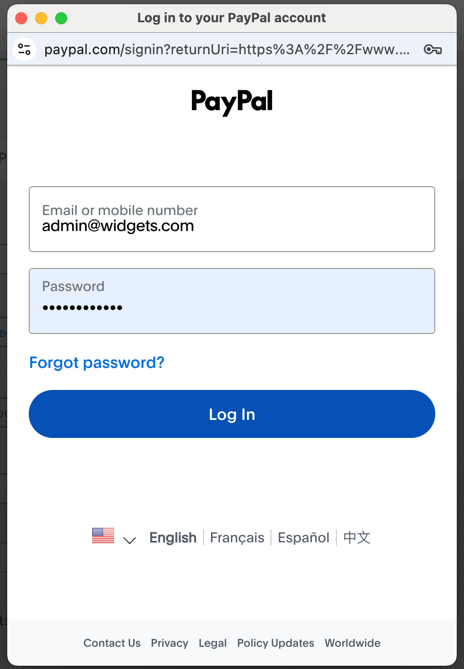
- If you have an existing PayPal account: You'll be directed to a login screen where you enter your password to authenticate
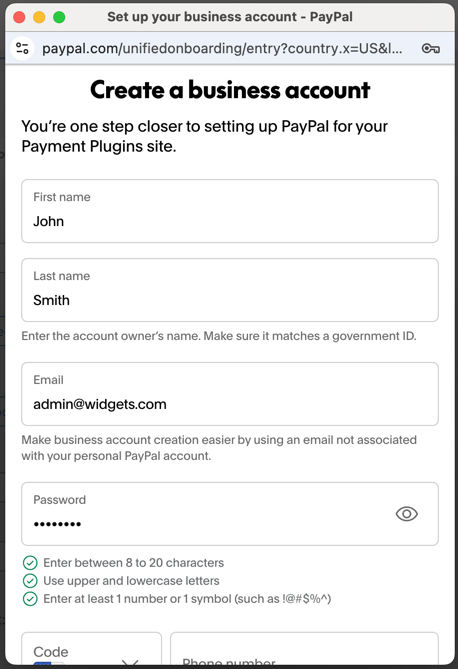
- If you don't have a PayPal account: PayPal will display a signup form where you can create a new business account by providing your business information
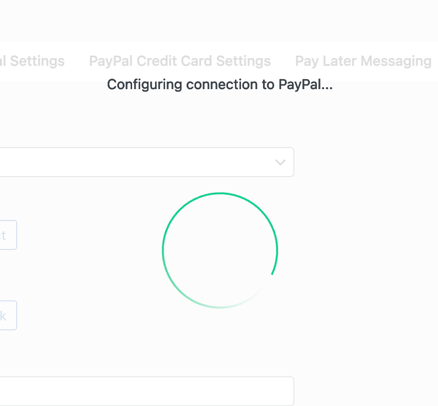
Step 4: Wait for the connection to process
After you successfully log in or create your account, PayPal redirects you back to your WordPress site. You'll see a message indicating that the connection is being configured. This process typically takes just a few seconds as the plugin automatically sets up the necessary API credentials and creates the required webhook.
Step 5: Verify your connection
Once the process completes, you'll return to the API Settings page where you can confirm everything worked correctly. You should see:
- Status: Connected with a green checkmark next to the "Connect to PayPal" section
- Your Production Client ID and Production Secret Key fields automatically populated
- A Create Webhook button that shows the webhook has been set up automatically
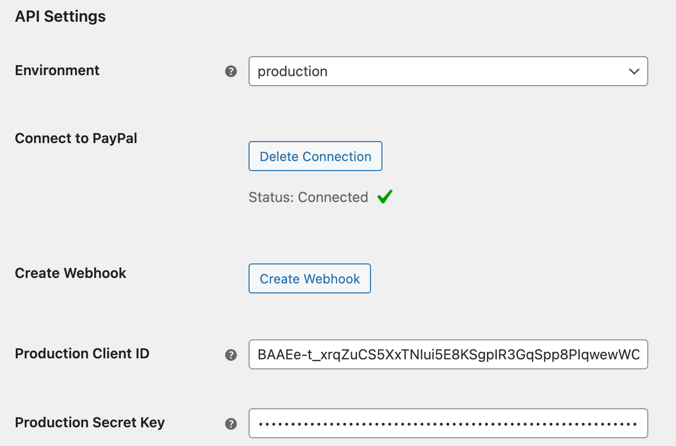
The Connect process not only establishes the connection but also handles webhook creation automatically. To learn more about what webhooks are and why they're important for your PayPal integration, see our Understanding Webhooks guide.
Using the manual connection process
The manual connection process gives you more control over your API credentials by creating them directly in PayPal's Developer portal. This method is ideal for developers who prefer to manage their own API applications or need specific configuration options that aren't available through the Connect process.
The steps for manually connecting the plugin are the same for Production and Sandbox environments.
Step 1: Access the PayPal Developer portal
Navigate to the PayPal Developer portal at https://developer.paypal.com/home/ and log in with your PayPal business account. Once logged in, click on Apps & Credentials in the navigation menu to access your API management area.

Step 2: Create a new application
On the Apps & Credentials page, click the Create App button to begin setting up your API credentials. This will open a dialog where you can configure your new application.
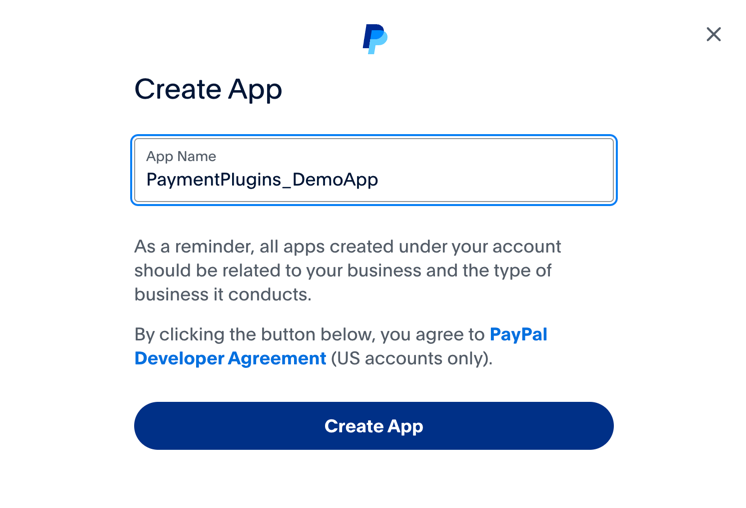
Enter a descriptive name for your application in the App Name field. Choose something that clearly identifies this connection to your WooCommerce store, such as "YourStoreName_PayPal" or "PaymentPlugins_YourSite". Click Create App to proceed.
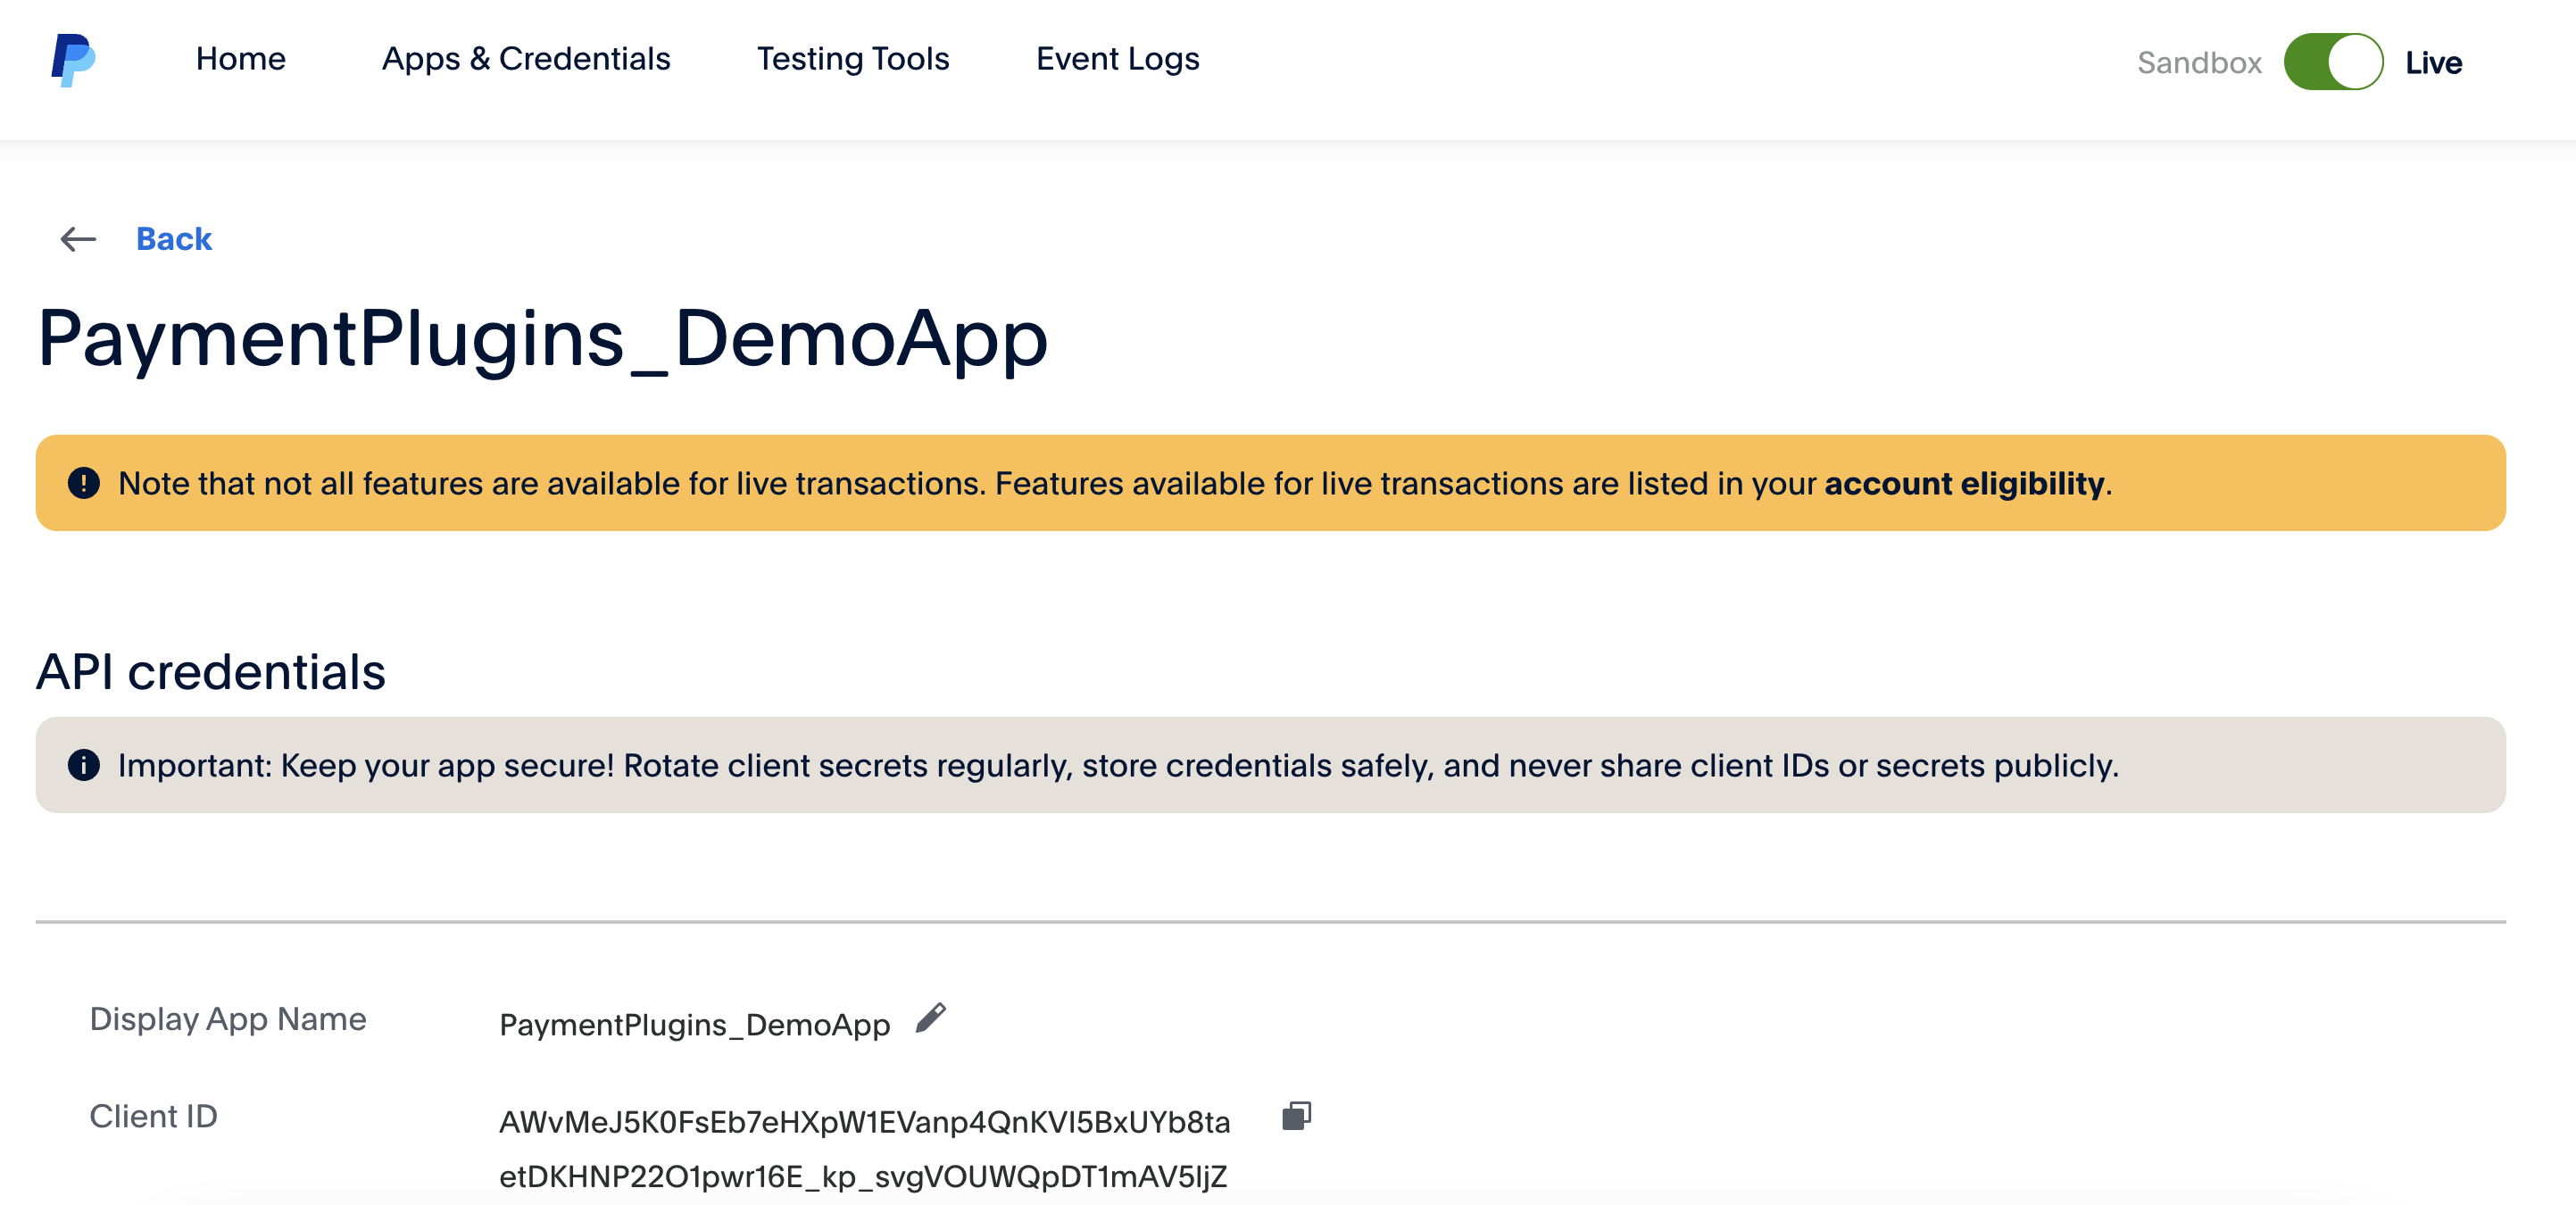
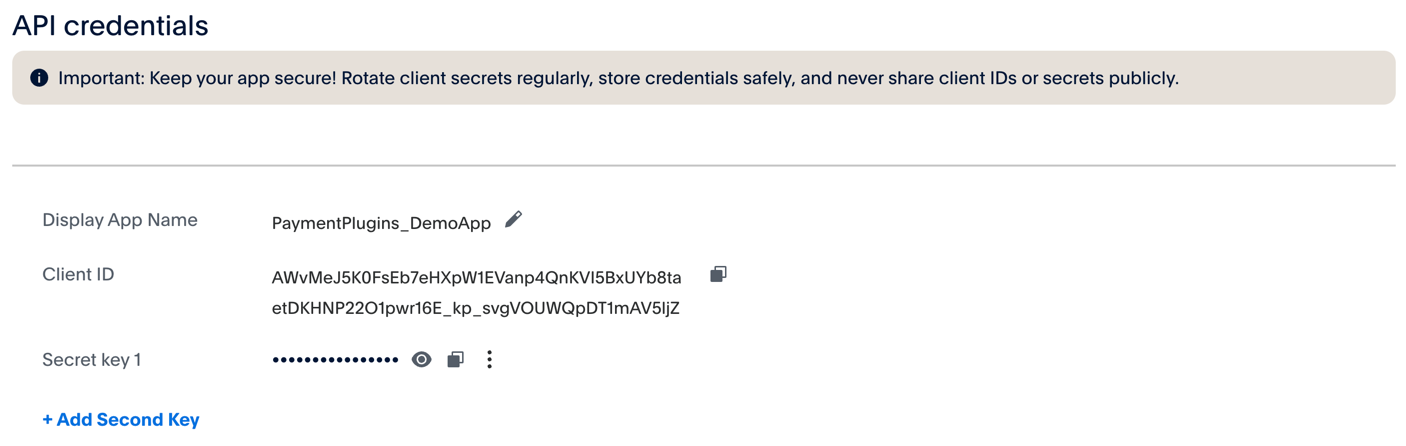
Step 3: Review your API credentials
After creating the app, PayPal redirects you to the application's main page where you can view your newly generated API credentials. You'll see your Client ID displayed prominently, along with options to view and copy your credentials.
Step 4: Configure payment features
Click on the Features tab to configure which payment methods your application will support. This is a critical step that determines what payment options will be available to your customers.
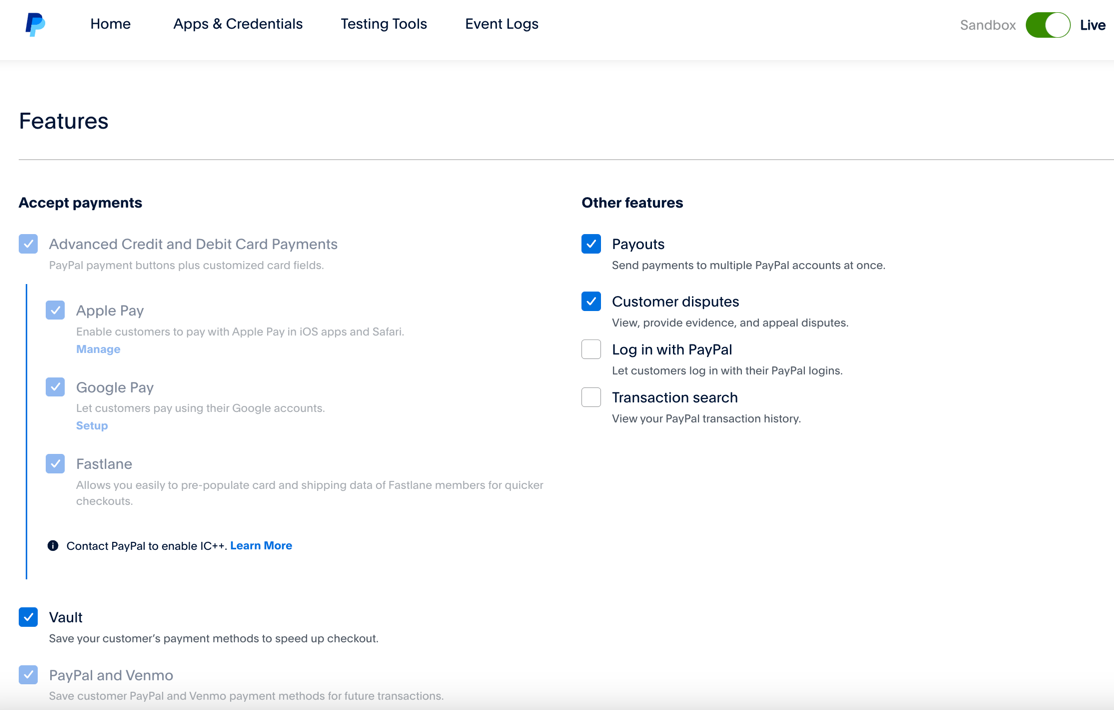
Make sure the following features are enabled based on your needs:
- Advanced Credit and Debit Card Payments: Required for direct credit card processing through PayPal
- Vault: Essential for saving customer payment methods for future purchases
- Fastlane: Enable this if you're in the US and want to offer PayPal's accelerated checkout experience
- PayPal and Venmo: Enable if you want to accept Venmo payments
If you don't see "Advanced Credit and Debit Card Payments" as an option, your PayPal account may not be eligible for this feature. Contact PayPal support to verify your account's eligibility for advanced card processing.
Step 5: Copy your API credentials
Return to the API credentials section to copy your Client ID and Secret Key. You'll need both of these to configure the plugin in your WordPress admin area.
Step 6: Enter credentials in the plugin
Navigate back to your WordPress admin area and go to WooCommerce > PayPal by Payment Plugins > Settings. On the API Settings page, you'll see fields for Production Client ID and Production Secret Key (or Sandbox equivalents if you're testing).
Paste your Client ID and Secret Key into the corresponding fields. Make sure you're using the credentials that match your selected environment (production or sandbox).
Unlike the Connect process, manual setup requires you to create webhooks separately if you need them for your payment workflow. You can use the Create Webhook button on the API Settings page after entering your credentials.