Webhooks
How Do PayPal Webhooks Work?
A webhook is a URL where PayPal sends instant notifications to your WooCommerce store whenever payment events occur. When something happens in your PayPal account - like a payment being completed or a refund being processed - PayPal immediately sends a notification to your store with the event details. The PayPal plugin receives that webhook and then performs the respective action within your store.
Here's the simple flow: An admin creates a refund in PayPal → PayPal instantly sends a notification to your store → Your store receives this notification → The refund automatically appears in your WooCommerce orders. Without webhooks, you'd have to manually check PayPal and update your store records yourself.
This system works for all payment events. Whether a customer completes a payment, an admin processes a refund, or a dispute is created, your store stays synchronized automatically with your PayPal account.
How Webhooks Keep Your Store Secure
Security is built into every webhook notification PayPal sends. When PayPal delivers a webhook to your store, they include a digital signature with the message - think of it as PayPal's official seal of authenticity.
Your PayPal plugin acts like a security guard, checking this signature against the webhook ID before processing any notification. It's like a secret handshake between PayPal and your store. Only when the plugin confirms the signature is genuine does it allow the webhook to update your store records.
This verification process prevents anyone from sending fake payment notifications to your store. The webhook ID you'll set up serves as a crucial key in this security system, ensuring that only legitimate PayPal notifications can affect your orders.
Why Your Store Needs a Webhook
While your PayPal payments will work without a webhook, setting one up is highly recommended because it keeps your store and PayPal account perfectly synchronized.
Here's what happens with a webhook: When an admin processes a refund in PayPal, the refund immediately appears in your WooCommerce orders. When a dispute is created, you're notified right away. Payment processing itself doesn't require webhooks, but webhooks ensure that administrative actions like refunds and disputes automatically sync between PayPal and your store.
Without a webhook, refunds and disputes created in PayPal wouldn't automatically reflect in your store, creating potential confusion and requiring manual updates to keep your records accurate.
Two Ways to Create Your Webhook
You can set up your webhook using either an automatic method through the plugin or by manually creating it in PayPal's developer portal.
The Automatic Route
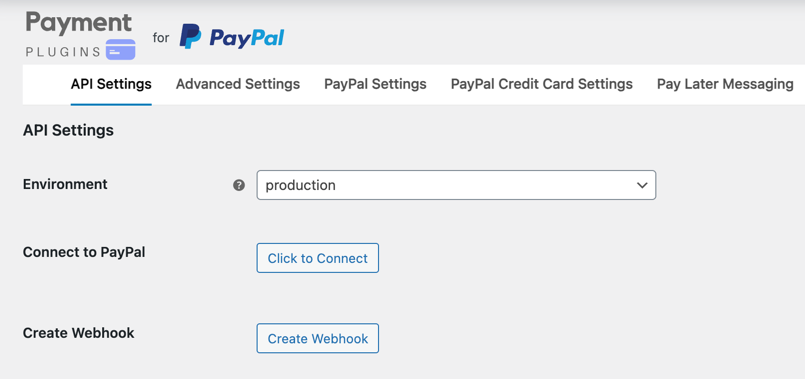
When you connect your PayPal account using the Click to Connect button in the plugin's API Settings, the webhook is created automatically during the connection process. If for any reason the webhook creation fails during connection, you can use the Create Webhook button to set it up separately.

Webhook creation will fail on localhost environments since PayPal requires a real, publicly accessible URL to send notifications to.
This automatic method is the fastest and most reliable approach, as the plugin handles all the configuration details for you. If you manually enter your API keys, you can click the Create Webhook button once your site is connected.
The Manual Route
Sometimes you might prefer to create the webhook manually, or you might be working with an existing PayPal app that requires manual configuration. This method gives you complete control over the webhook setup process.
Setting Up Your Webhook Manually
If you choose the manual route, you'll need to access PayPal's Developer portal and configure the webhook yourself.
Accessing PayPal's Webhook Settings
Log into the PayPal Developer portal and navigate to Apps & Credentials. Find your application and click on it to open the configuration page. Scroll down until you see the Add Webhook button.

Configuring Your Webhook URL
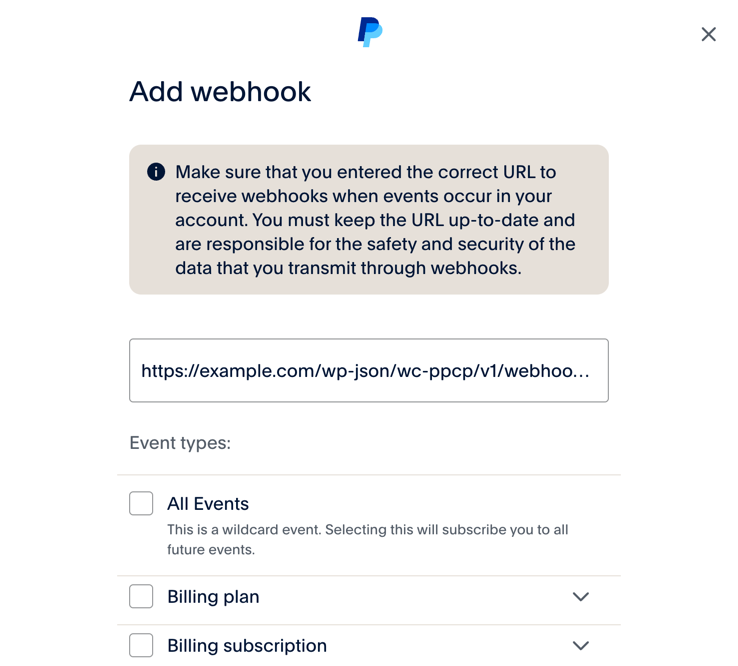
When you click Add Webhook, PayPal will ask for your webhook URL. This is the specific address where PayPal will send notifications to your store.

Your webhook URL follows this format: https://your-store.com/wp-json/wc-ppcp/v1/webhook/production
Replace "your-store.com" with your actual domain name. If you're working in PayPal's sandbox environment for testing, use "sandbox" instead of "production" at the end of the URL.
You can find your exact webhook URL displayed in the API Settings page of the PayPal plugin - simply copy it from there and paste it into PayPal's webhook form.

Selecting the Right Events
PayPal offers dozens of different webhook events, but your WooCommerce store only needs to listen for specific payment-related events. Select these essential events when setting up your webhook:
- Payment capture completed - When a payment is successfully processed
- Payment capture denied - When a payment attempt is declined
- Payment capture refunded - When a refund is processed
- Checkout order approved - When a customer approves their payment
- Checkout order processed - When an order moves through PayPal's system
- Customer dispute created - When a customer opens a dispute
- Customer dispute resolved - When a dispute is closed
These events cover all the critical payment scenarios your store needs to track. Selecting additional events won't hurt, but these seven are the essential ones for keeping your store synchronized with PayPal.
Completing Your Webhook Setup
Once you've created the webhook in PayPal's developer portal, PayPal will generate a unique webhook ID. This ID is crucial for the security verification process we discussed earlier.

Copy this webhook ID from PayPal and paste it into the Production Webhook ID field in the plugin's API Settings page. If you created a sandbox webhook for testing, paste that ID into the Sandbox Webhook ID field instead.
After entering the webhook ID, save your plugin settings. Your webhook is now active and ready to keep your store synchronized with PayPal.
What Happens Next?
With your webhook properly configured, your store will automatically receive notifications from PayPal whenever payment events occur. You won't see these notifications directly - they work behind the scenes to keep your order statuses, refunds, and payment records up to date.
If logging is turned on in the plugin settings, each time a webhook notification is received, a log entry is added to the wc-ppcp log file indicating the time and notification type. This log file is located in the WooCommerce > Status > Logs page of your WordPress site and can be helpful for troubleshooting or verifying that webhooks are being received properly.
