
Have an online business idea but are feeling overwhelmed with setting it up with WordPress?
No worries! In this comprehensive guide, we’ll walk you through the steps to build an ecommerce website with WordPress and easily install payment methods using Payment Plugins. Let’s get started.
Table of contents:
- Why Do I Need WooCommerce with WordPress?
- 1. Choose A Domain and Hosting
- 2. Install WordPress
- 3. Select a Theme
- 4. Install WooCommerce
- 5. Configure WooCommerce
- 6. Set Up Payment Gateways with WooCommerce
- 7. Configure Shipping Settings in WooCommerce
- 8. Accept Recommended Extensions (Optional)
- 9. Add Products
- 10. Customize Your Store
- 11. Install Essential Plugins
- 12. Test Your Store
- 13. Launch Your Website
- How Much Does It Cost to Setup a WordPress Site?
Why Do I Need WooCommerce with WordPress?
WooCommerce is a free-to-use plugin that enables you to sell digital and physical products on WordPress. This helpful tool offers convenience and affordability for beginners and works well with many other plugins such as Payment Plugins. Other reasons also include:
- Scalability: WooCommerce can scale with your business and it can handle a wide variety of products and transactions.
- SEO-Friendly: WooCommerce is designed with SEO in mind, which means, it’ll be easier for your products and services to be discovered by search engines and potential buyers.
- Customization: WooCommerce is highly customizable and flexible, allowing you to tailor the appearance and functionality of your website to your needs.
For these reasons, we’ll be using WooCommerce with WordPress as part of this tutorial.
Choose A Domain and Hosting
Let’s break down the first step a bit.
1. Choose/Buy a Domain Name
The first part is to choose a domain name for your ecommerce platform. The format will look something like “exampledomainname.com”. If you need inspiration, or tips on how to create one, visit domain name generator tools or sites such as domainwheel.com.
If you already have a domain name in mind, you can go ahead and purchase it, either through a hosting provider (Bluehost, Hostgator, Dreamhost, etc.) or a domain name provider (such as Namecheap or Domain.com).
Although it costs a little more, it is easier to buy a domain name through a hosting provider as they configure your domain name to your website on your behalf. They will also walk you through the process of setting that up when you first create an account.
Purchasing a domain name through a domain name registrar is oftentimes cheaper but it requires some technical setup that can get complicated for non-tech-savvy individuals. However, there are plenty of resources available to guide you through this option.
For convenience reasons, we recommend registering a domain through your chosen host provider but feel free to choose whichever option works best for you.
2. Choose Your Hosting Provider
A web host provider is a service that offers a place for you to store your website or ecommerce store and make it accessible to the internet. While there are many hosting services available, WordPress recommends Bluehost and Dreamhost as some of the best. Again, choose the one that fits your needs.
It should be noted that there are two different types of WordPress: WordPress.com and WordPress.org. WordPress.com is fully hosted, whereas WordPress.org, the software version, is self-hosted, meaning that you have to find the hosting provider.
We’ll use WordPress.org for this tutorial as it offers greater control and customization than WordPress.com.
Nearly every hosting provider includes WordPress hosting as part of their services. What this means is when you sign up and purchase a WordPress hosting plan, the hosting provider will automatically install WordPress with your account (1-click WordPress installation).
2. Install WordPress
If WordPress is not already installed after you have signed up and purchased your hosting plan, you will need to log in to your hosting account/dashboard (cPanel) and install it manually. To find the installation button within cPanel:
- Find and select “Websites” followed by “Manage Websites” on the left-hand side menu.
- Then, locate the website you want to install WordPress on, select it, and click “Manage”.
- You should see “Install WordPress”. Click it and WordPress will be installed on your website.
Your hosting provider may not use cPanel and thus installing WordPress may vary slightly, but it should look very similar. You may need to access your provider’s help or support resources for assistance.
Usually, hosting providers will guide you through this process when setting up your account the first time. They also, as we’ve mentioned earlier, offer 1-click WordPress installation as part of their services with no extra cost.
3. Select a Theme
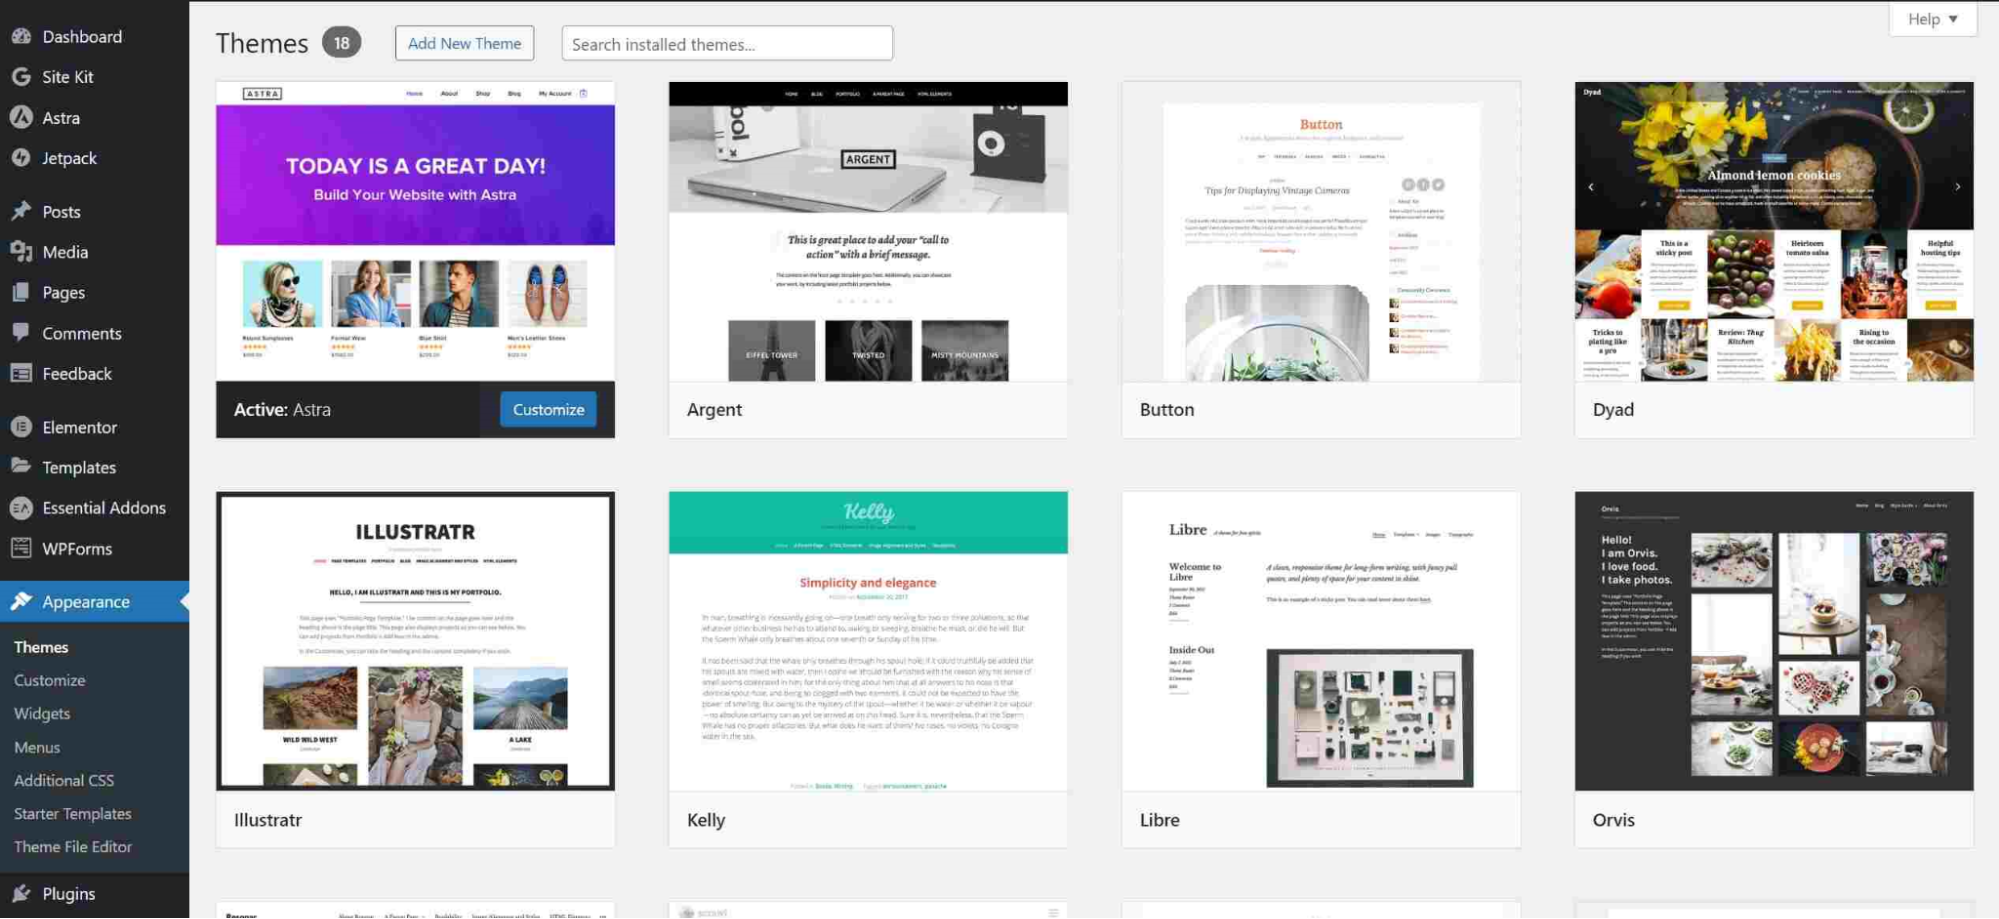
Once you’ve successfully installed WordPress on your site, it’s time to start customizing it by selecting a theme. A theme is simply a template file or stylesheet that determines the overall look and feel of your ecommerce store.
To add and customize a theme, follow these steps:
- Login to the WordPress dashboard.
- Go to “Appearance” > “Themes” on the left-hand side.
- Select “Add New” at the top of the page to find or add a new theme.
- Search for a theme (there are various free themes to choose from that are designed for Woocommerce).
- Preview a theme. A preview button should appear when you hover over a sample.
- Install your chosen theme with the “Install” button.
- After installing the theme, select “Activate”.
- Customize your theme under “Appearance” > “Customize”.
- Install plugins or widgets to enhance the theme’s functionality and appearance
4. Install WooCommerce
Next, we need to install and activate the WordPress WooCommerce plugin, which is super easy to do:
- Go to “Plugins” > “Add New”
- Search for “WooCommerce” in the search bar
- Select “Install”
- Click “Activate”
5. Configure WooCommerce
Once you’ve installed and activated WooCommerce, you’ll need to set up your store.
During this step, WooCommerce will ask you to provide the following information:
- Store location (country)
- Store Address
- What type of products you intend to sell (digital, physical, or both)
These can be updated later if necessary.
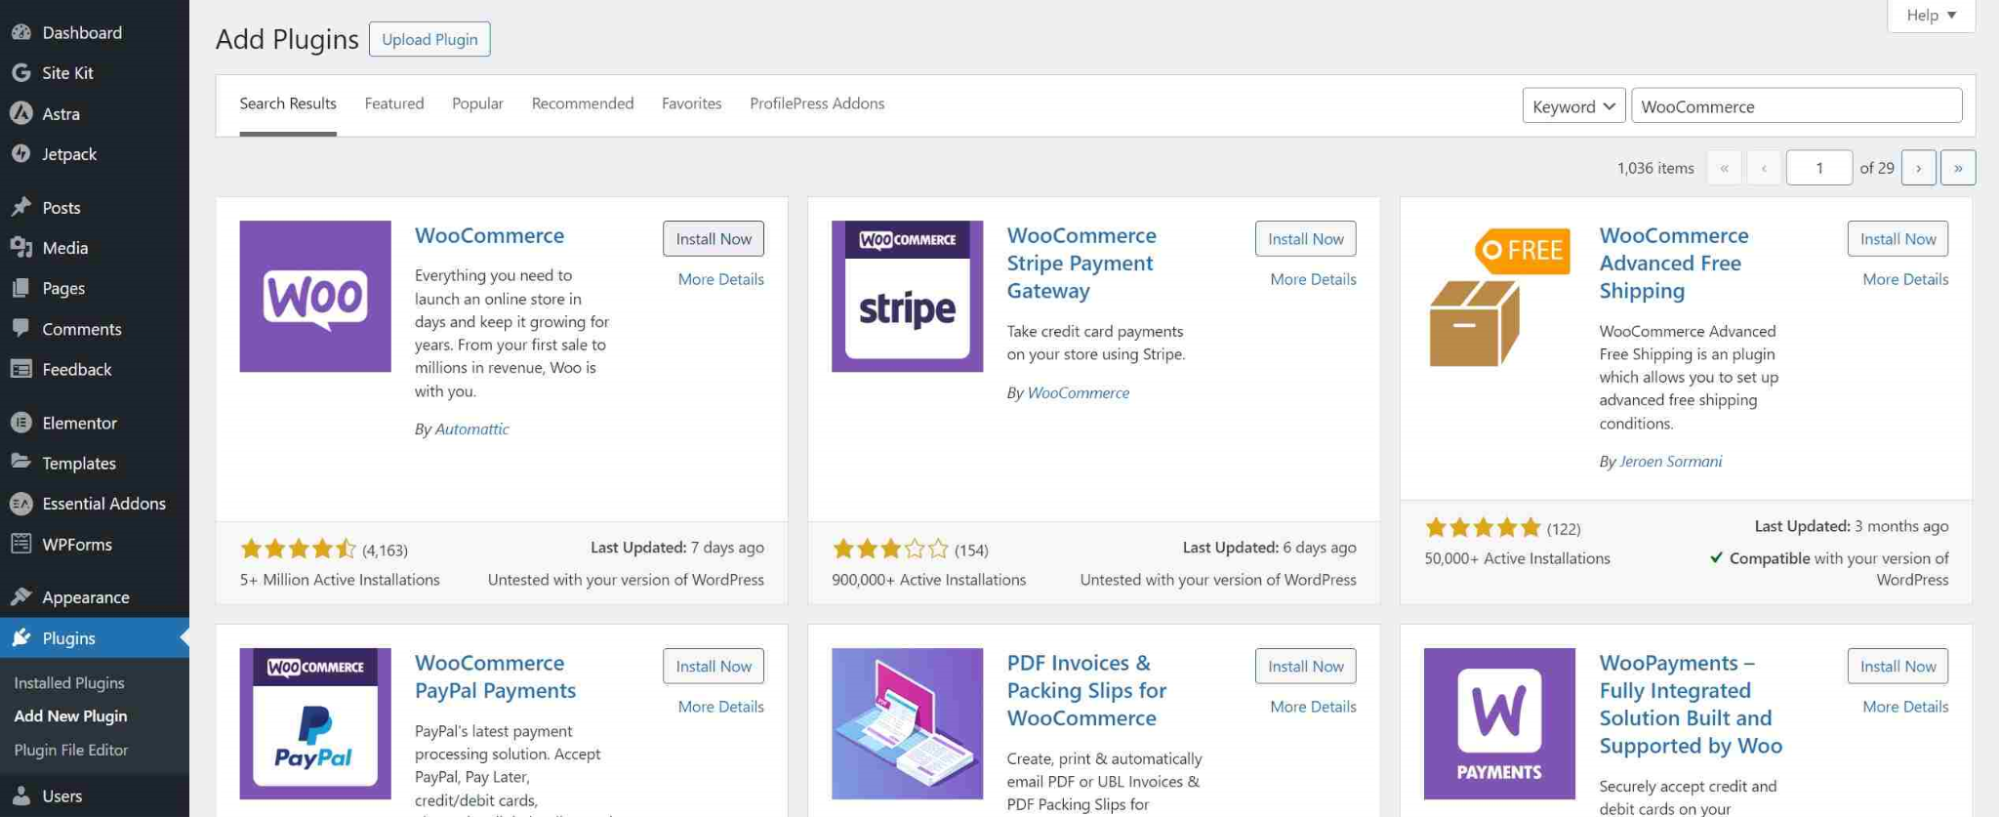
6. Set Up Payment Gateways with WooCommerce
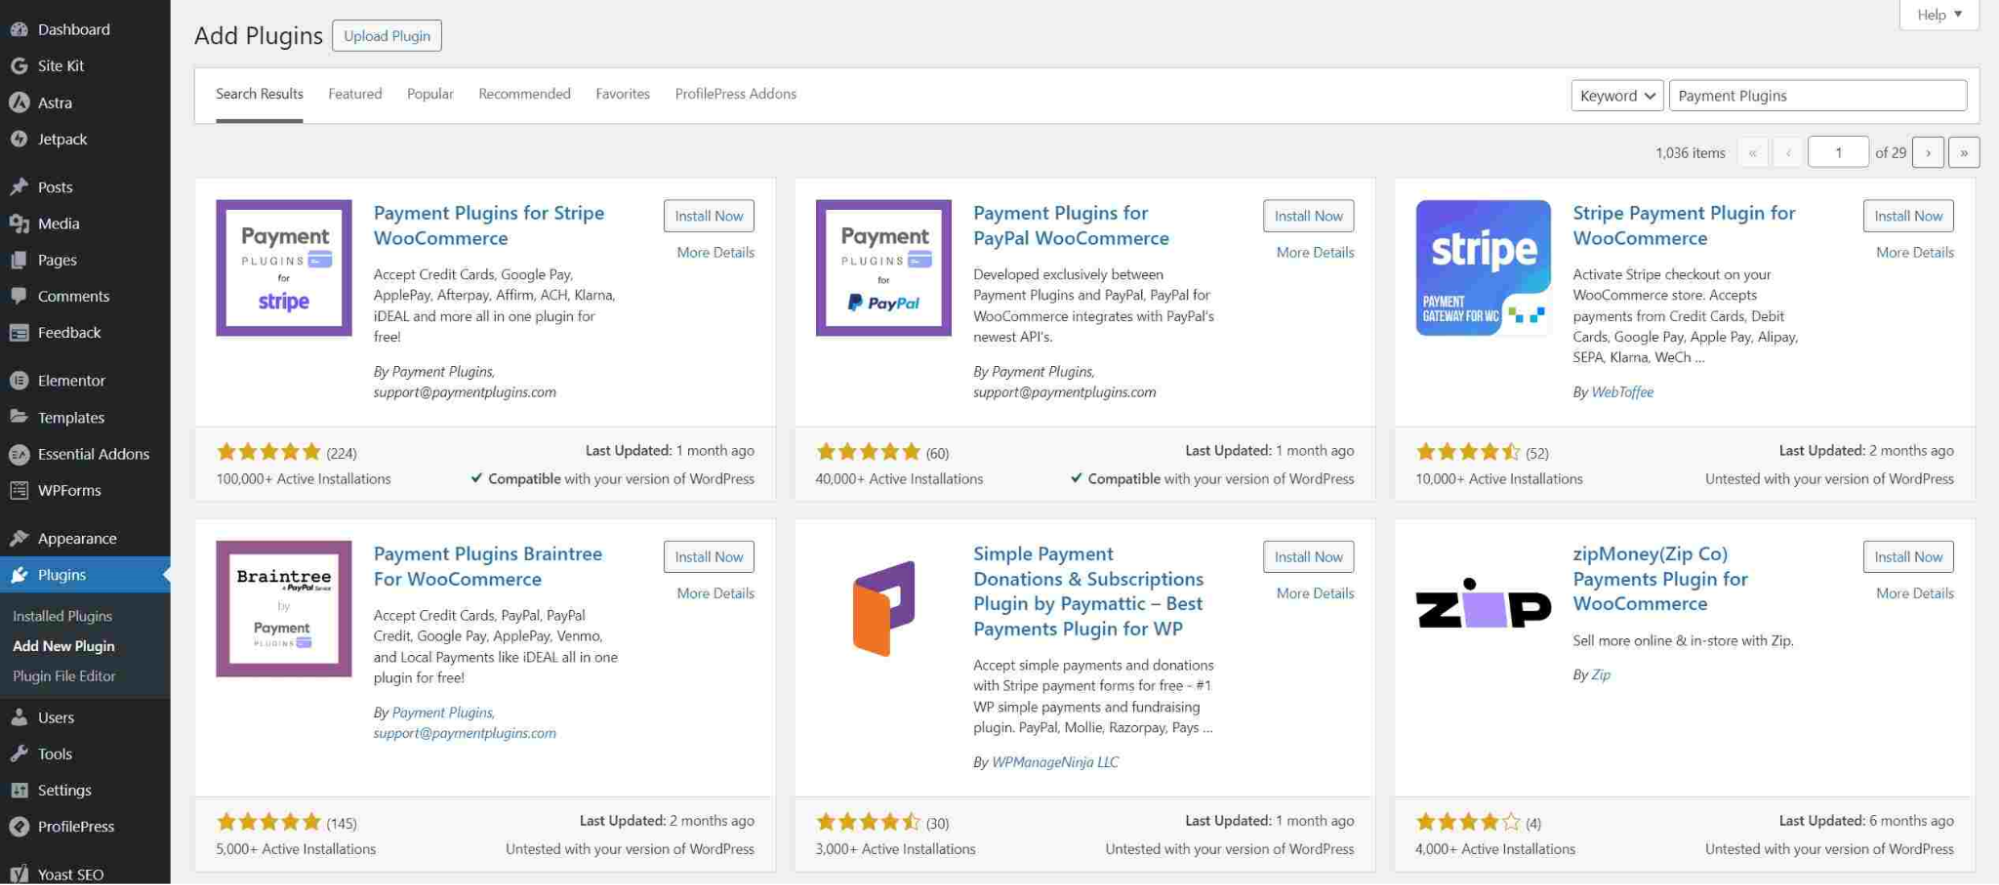
After WooCommerce has been installed and set up, it’s time to add a payment gateway. WooCommerce gives you the option to add their default payment gateway methods during installation. However, if you want to ensure a smooth, reliable, secure, and streamlined experience for your customers when they checkout, add Payment Plugins to your ecommerce platform.
Here’s how:
- Start by going to “Plugins” > “Add New”
- Search for Payment Plugins in the search bar to find the appropriate application (Payment Plugins for Stripe WooCommerce, Payment Plugins for PayPal WooCommerce, and Payment Plugins for Braintree WooCommerce)
- Click “Install”
- Follow the prompts to connect your new payment gateways to PayPal, Stripe, and Braintree
You can also download the plugins from our website and upload them to WordPress.
To do that:
- Visit https://paymentplugins.com/all-plugins/
- Download all of the appropriate plugins that you need
- Log in to your WordPress account
- Go to “Plugins” > “Add New”
- Click “Upload Plugin” (you should see this next to “Add Plugins”)
- Select “Choose File”
- Search for and select the plugin you wish to install
- Select “Install Now”
- Once installed, click “Activate Plugin”
- Follow the instructions from our plugins to configure your payment gateways
We make it easy to download and install our payment plugins with WooCommerce. And it’s 100% free!
We also recommend that you verify that SSL is installed for payment security (your selected host provider should offer this on setup). You can verify that you have one installed if you see the letters https at the beginning of the URL or a lock icon to the left of it.
Configure Shipping Settings in WooCommerce
With WooCommerce, you also need to configure your shipping settings if you plan to sell physical products. The store plugin will guide you through this step on installation, but you need to determine if shipping will be free, or if there will be a flat rate. Consider the size and weight of your products, the shipping distance, etc., to determine the shipping rates.
8. Accept Recommended Extensions (Optional)
This part is optional but highly recommended. WooCommerce includes free extensions that make it easier to calculate taxes for customers when they make a purchase. It also calculates taxes for you as the seller. The extensions can likewise be used to collect and view important metrics or data such as total sales or abandoned items at checkout.
9. Add Products

Now it’s time to add some products. You can do this manually or you can import your products via a CSV file.
Adding a product is similar to adding a blog post.
To manually add a product:
10. Customize Your Store
There are many popular page builder plugins which are drag-and-drop tools that give you control over the layout and design of your online store. Some notable plugins include Elementor, Beaver Builder, and WPBakery Page Builder, all of which are compatible with WooCommerce. Most are free, but if you want access to additional tools that give you greater customization features, you’ll need to upgrade to a paid plan.
When designing your store, include essential pages such as a “Shop”, “Cart” and a custom WooCommerce checkout page. WooCommerce will create these by default on setup, but if you accidentally delete or skip the step that creates these, go to:
- “WooCommerce” > “Status” > “Tools”
- Select “Create Pages” to create the default pages
11. Install Essential Plugins
You may wish to consider installing essential plugins to enhance your site’s security, performance, and SEO (Search Engine Optimization). Ultimately, the right plugins can help boost traffic to your ecommerce platform and increase online visibility. Plugins worth considering are:
- Yoast SEO: Helps you to optimize site content.
- Google Analytics: Allows you to connect and monitor traffic to your site, conversion rates, etc.
- Akismet: Blocks spam comments.
- WP Super Cache: Improves website loading speeds.
- WP Smush: Reduces image file size without affecting their quality.
- WPForms: Customizable contact forms.
Keep in mind that installing too many plugins can end up slowing your site, so only install the ones you need, and double-check to make sure they are compatible with WooCommerce.
12. Test Your Store
You can test your store before it goes live by enabling its test mode feature. You will need to create a business sandbox account for PayPal, Braintree, and Stripe, and verify that the payment plugin(s) you installed are enabled. Here’s how to enable the test mode feature for each payment method:
PayPal
- Create a Sandbox Business Account and a Sandbox Buyer Account on PayPal’s developer website. Or, log in with your PayPal account if you already have one.
- Go to “Testing Tools” > “Sandbox Accounts.” You should see two different Sandbox test accounts: Business and Personal. If not, click on the blue “Create account” to create those.
- Go to navigation and click “Apps & Credentials.”
- Select the blue highlighted “Default Application.”
- Copy the Client ID number under “API credentials” (leave PayPal open as we’ll need to come back to it).
- Go back to WordPress, and select “WooCommerce” > “PayPal by Payment Plugins.”
- Select the “API Settings” tab.
- Next, change the “Environment” setting to “sandbox” to enable the test mode.
- You can either manually enter your PayPal Client ID and Secret Key, or use the automated Connect feature.
- Save your changes and the plugin should automatically connect if everything went smoothly.
You can connect to PayPal via the “Connect” button, but for that, you will need to find, copy, and paste your Sandbox Business Account email (which has an @business.example.com at the end) and its password into the popup. Those details can be located on the developer page under “Testing Tools” > “Sandbox Accounts.” Select the blue highlighted business email address to find the password.
Once those details are submitted, the status of your plugin should update to show that it is connected to your PayPal account. Save your changes and then proceed to test a transaction in your WooCommerce store. If you need further assistance on connecting or setting up the PayPal checkout plugin, visit our documentation guide.
Braintree
- Create an account to process real payments and a Sandbox Account to enable test mode.
- Once these accounts are created, in your Sandbox Account, find the “Sandbox Keys & Configuration.” This is where you’ll find the Public Key, Private Key, and Merchant ID. You’ll need to copy and paste these over to WordPress.
- In WordPress, go to “Braintree Gateway” > “Settings” > “API Settings”.
- Paste the Sandbox Public Key, Sandbox Private Key, and Sandbox Merchant ID from your Braintree Sandbox Account.
- Next, test the sandbox connection by selecting the “Sandbox Connection Test” button. This button will alert you if any of the values were entered incorrectly.
- Save your changes and enable as many payment methods as you want to test (PayPal checkout, credit card, Google Pay, etc.).
- When you’re ready to switch over to accepting real payments, go back to your API Settings for Braintree and select the “Production” option in “Active Environment”.
You can find additional information on how to set up the Payment Plugin for Braintree by visiting our support guide.
Stripe
- Register an account with Stripe. Upon registration, you can start accepting live payments or simulate payments using the test mode feature.
- In the WooCommerce settings, find the Stripe byPayment Plugins link.
- Go to “API Settings” and switch the Mode field to “Test” if it is not already set by default.
- Next, select the “Click to Connect” button to connect your Stripe account.
- Enter your account information.
- Once completed, click on “Connection Test” to verify the connection was successful.
- When using test mode, you can also manually enter your API keys if you prefer that option.
- From here you can enable and test the different payment options available through Stripe (Credit/Debit cards, Google Pay, ACH, etc.).
For additional guidance on how to set up our Stripe payment processing plugin, visit our support guide here.
13. Launch Your Website
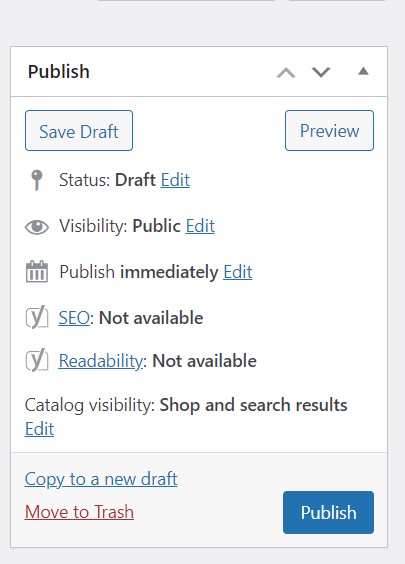
When you’re ready to launch or publish your ecommerce store, go to “Pages,” “Posts,” or “Products.” A list of pages, posts, or products you’ve created should appear. From there find the page, post, or product you want to publish and select it. Once you’ve accessed the page that allows you to make edits or changes to it, find the blue “Publish” button to have it go live. If you’re not ready for a page to go live yet, you can save it as a draft instead.
How Much Does It Cost to Setup A WordPress Site?
The cost to build an ecommerce website on WordPress will vary depending on the services you select (i.e., hosting plan, addons, paid plugins, etc.) and your business needs. According to Forbes, a domain can cost between $0 to $20 per year, with hosting costing $30 to $500 per year. In summary, you could end up paying hundreds to thousands of dollars to build and run an online store. Your costs can also increase over time if your ecommerce store brings in significant traffic.
Wrapping Up
While this guide does not cover everything, it does cover the basics. If you’re still feeling overwhelmed at the prospect of building an ecommerce WordPress site for your business, remember that there are plenty of online resources to help you out. As a final note, regularly update, monitor, and back up your website in the event something happens to it and scale as needed.