Testing Guide
Before launching Apple Pay on your live store, you need to verify that payments process correctly and customers can complete transactions smoothly. Apple Pay testing presents a unique challenge because it requires actual Apple devices and specific account configurations that differ from typical payment gateway testing.
Unlike other payment methods where you can easily switch between test and live modes, Apple Pay testing requires careful consideration of your approach. You have two main options: testing in production mode using payment authorizations, or creating a separate sandbox environment with test accounts.
The Recommended Approach: Production Mode with Authorization
The simplest and most reliable way to test Apple Pay is to use your live production environment with the Transaction Type set to "Authorize." This method bypasses the complexity of having to create a sandbox Apple account while still allowing you to safely test real payments without incurring fees or needing to process refunds.
First, navigate to WooCommerce → Settings → Payments → Apple Pay in your WordPress admin. Under the Transaction Type setting, select "Authorize" from the dropdown menu. This tells the plugin to hold funds for verification rather than capturing them immediately.
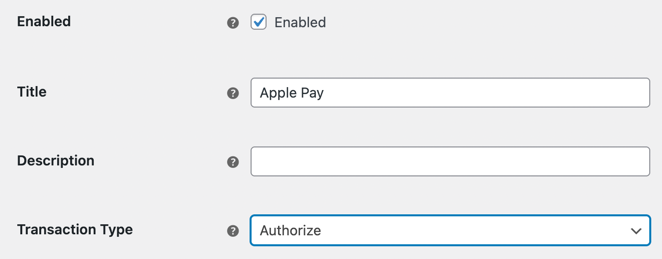
Setting Transaction Type to Authorize
How Authorization Testing Works
When you set the transaction type to "Authorize," PayPal will validate the payment method and reserve the funds, but won't actually transfer the money to your account.
For testing purposes, you'll void these authorizations after verifying that the payment flow works correctly. This prevents any transaction fees and eliminates the need to process refunds. The authorized funds are immediately released when you void the authorization.
Preparing Your Environment
Before you begin testing, ensure your domain is properly registered with Apple Pay. Your domain association file must be uploaded to your server and accessible at https://yourdomain.com/.well-known/apple-developer-merchantid-domain-association. You can verify this by visiting that URL directly in your browser—it should download or display the file.
In your PayPal account, confirm that your domain appears in the registered domains list. If you recently added it, give Apple a few minutes to process the registration before attempting your first test transaction.
Running Your Test
Add products to your cart and proceed to checkout on an Apple device using Safari. When you reach the payment methods section, you should see Apple Pay as an available option. If it doesn't appear, double-check that:
- You're using an Apple device with Safari browser
- You have at least one card configured in your Apple Wallet
- Your domain association file is properly uploaded
- Your domain is registered in your PayPal account
Complete the transaction using Apple Pay. After the order is created in WooCommerce, check your PayPal account to verify the payment shows as "Authorized" rather than "Completed."
Canceling Test Authorizations
Once you've confirmed the payment processed correctly, you can void the authorization directly from your WordPress admin. Navigate to WooCommerce → Orders and open the order details page for your test transaction. You'll see the authorization status displayed in the order details, along with an option to void the authorization.
Click the void button to cancel the authorization and release the funds immediately. This prevents any fees from being charged to your account and keeps your test transactions separate from real orders.
You can run multiple test transactions using this method without incurring costs. Just remember to void each authorization after you've verified it processed correctly.
Alternative Approach: Sandbox Testing with iTunes Test Accounts
If you prefer to test in a sandbox environment, you'll need to create an Apple iTunes sandbox account and configure your testing devices to use it. This approach more closely mimics the test environments you might use with other payment gateways, but requires additional setup steps.
Creating Your Sandbox Test Account
Apple manages sandbox accounts through App Store Connect, even though you're testing payments rather than apps. Here's how to create a test account:
- Sign in to App Store Connect with your Apple Developer account
- On the homepage, click Users and Access
- Under the Sandbox section, click Testers
- Click the "+" button to create a new tester account
- Complete the tester information form with a unique email address (it doesn't need to be a real email)
- Click Invite to create the account
Apple will generate a test account that you can use on your devices. Take note of the email address and password you created, as you'll need these to sign in on your testing device.
Configuring Your Testing Device
Before you can test with your sandbox account, you need to sign out of your regular Apple Account and sign in with the test account. On your iOS device:
- Open the Settings app
- Tap your name at the top
- Scroll to the bottom and tap Sign Out
- After signing out, sign back in using your sandbox tester account credentials
Your device is now configured to use sandbox mode for Apple Pay transactions. Any payments you make will use test cards and won't process real money.
Using Sandbox Test Cards
Apple provides specific test card numbers that work in sandbox mode. You can find the complete list of test cards in Apple's sandbox testing documentation. These test cards simulate various scenarios including successful payments, declined transactions, and authentication challenges.
Add one or more of these test cards to your Apple Wallet while signed in with your sandbox account. Then proceed with testing transactions on your store just as you would with the production approach.
Limitations of Sandbox Testing
While sandbox testing provides a safe environment, it comes with some practical limitations. You need to maintain separate test accounts, remember to switch between sandbox and production accounts on your devices, and some payment scenarios may not perfectly reflect real-world behavior.
For most merchants, the production testing approach with authorizations offers a more streamlined experience without these complications.
Which Testing Method Should You Use?
We strongly recommend using production mode with authorization for testing Apple Pay. This approach is faster to set up, doesn't require managing separate test accounts, and tests your actual production environment where customers will make real purchases.
The sandbox testing approach makes more sense if you're doing extensive integration testing, building custom functionality around Apple Pay, or need to test specific error scenarios that are difficult to reproduce in production. For straightforward implementation verification, authorization testing in production mode is the clear choice.