What’s Coming in 4.0.0
- Updates to Google Pay
- New Payment Section option for express payment methods
- Updated UI for saved payment methods
- Updates to Buy Now Pay Later messaging
- Performance improvements
- Interactivity API Mini Cart support
- Installment UI updates
When we released Payment Plugins for Stripe WooCommerce back in 2019, our goal was simple: build a merchant-first Stripe integration that gave WooCommerce store owners more flexibility and control than anything else available. Since then, more than 100,000 stores have made it their payment plugin of choice, and we’ve never stopped looking for ways to make it better.
Version 4.0.0 is six years of lessons learned put into practice — a major update that builds on everything that’s made this plugin great and sets it up for the future.
This release brings several improvements merchants have asked for, along with under-the-hood changes that set the plugin up for the future. Here’s what’s new.
A Modern Foundation Built for What’s Next
Version 4.0.0 brings the plugin’s codebase fully up to date with modern JavaScript and PHP patterns. This isn’t something most merchants will notice directly — but it’s what powers everything else in this release and what allows us to move faster on new features, Stripe API updates, and WooCommerce compatibility going forward.
One thing we were deliberate about: every filter and hook we’ve ever shipped still works. If you or a developer has written custom code that extends or hooks into Stripe plugin behavior, it will continue to work in 4.0.0 without any changes.
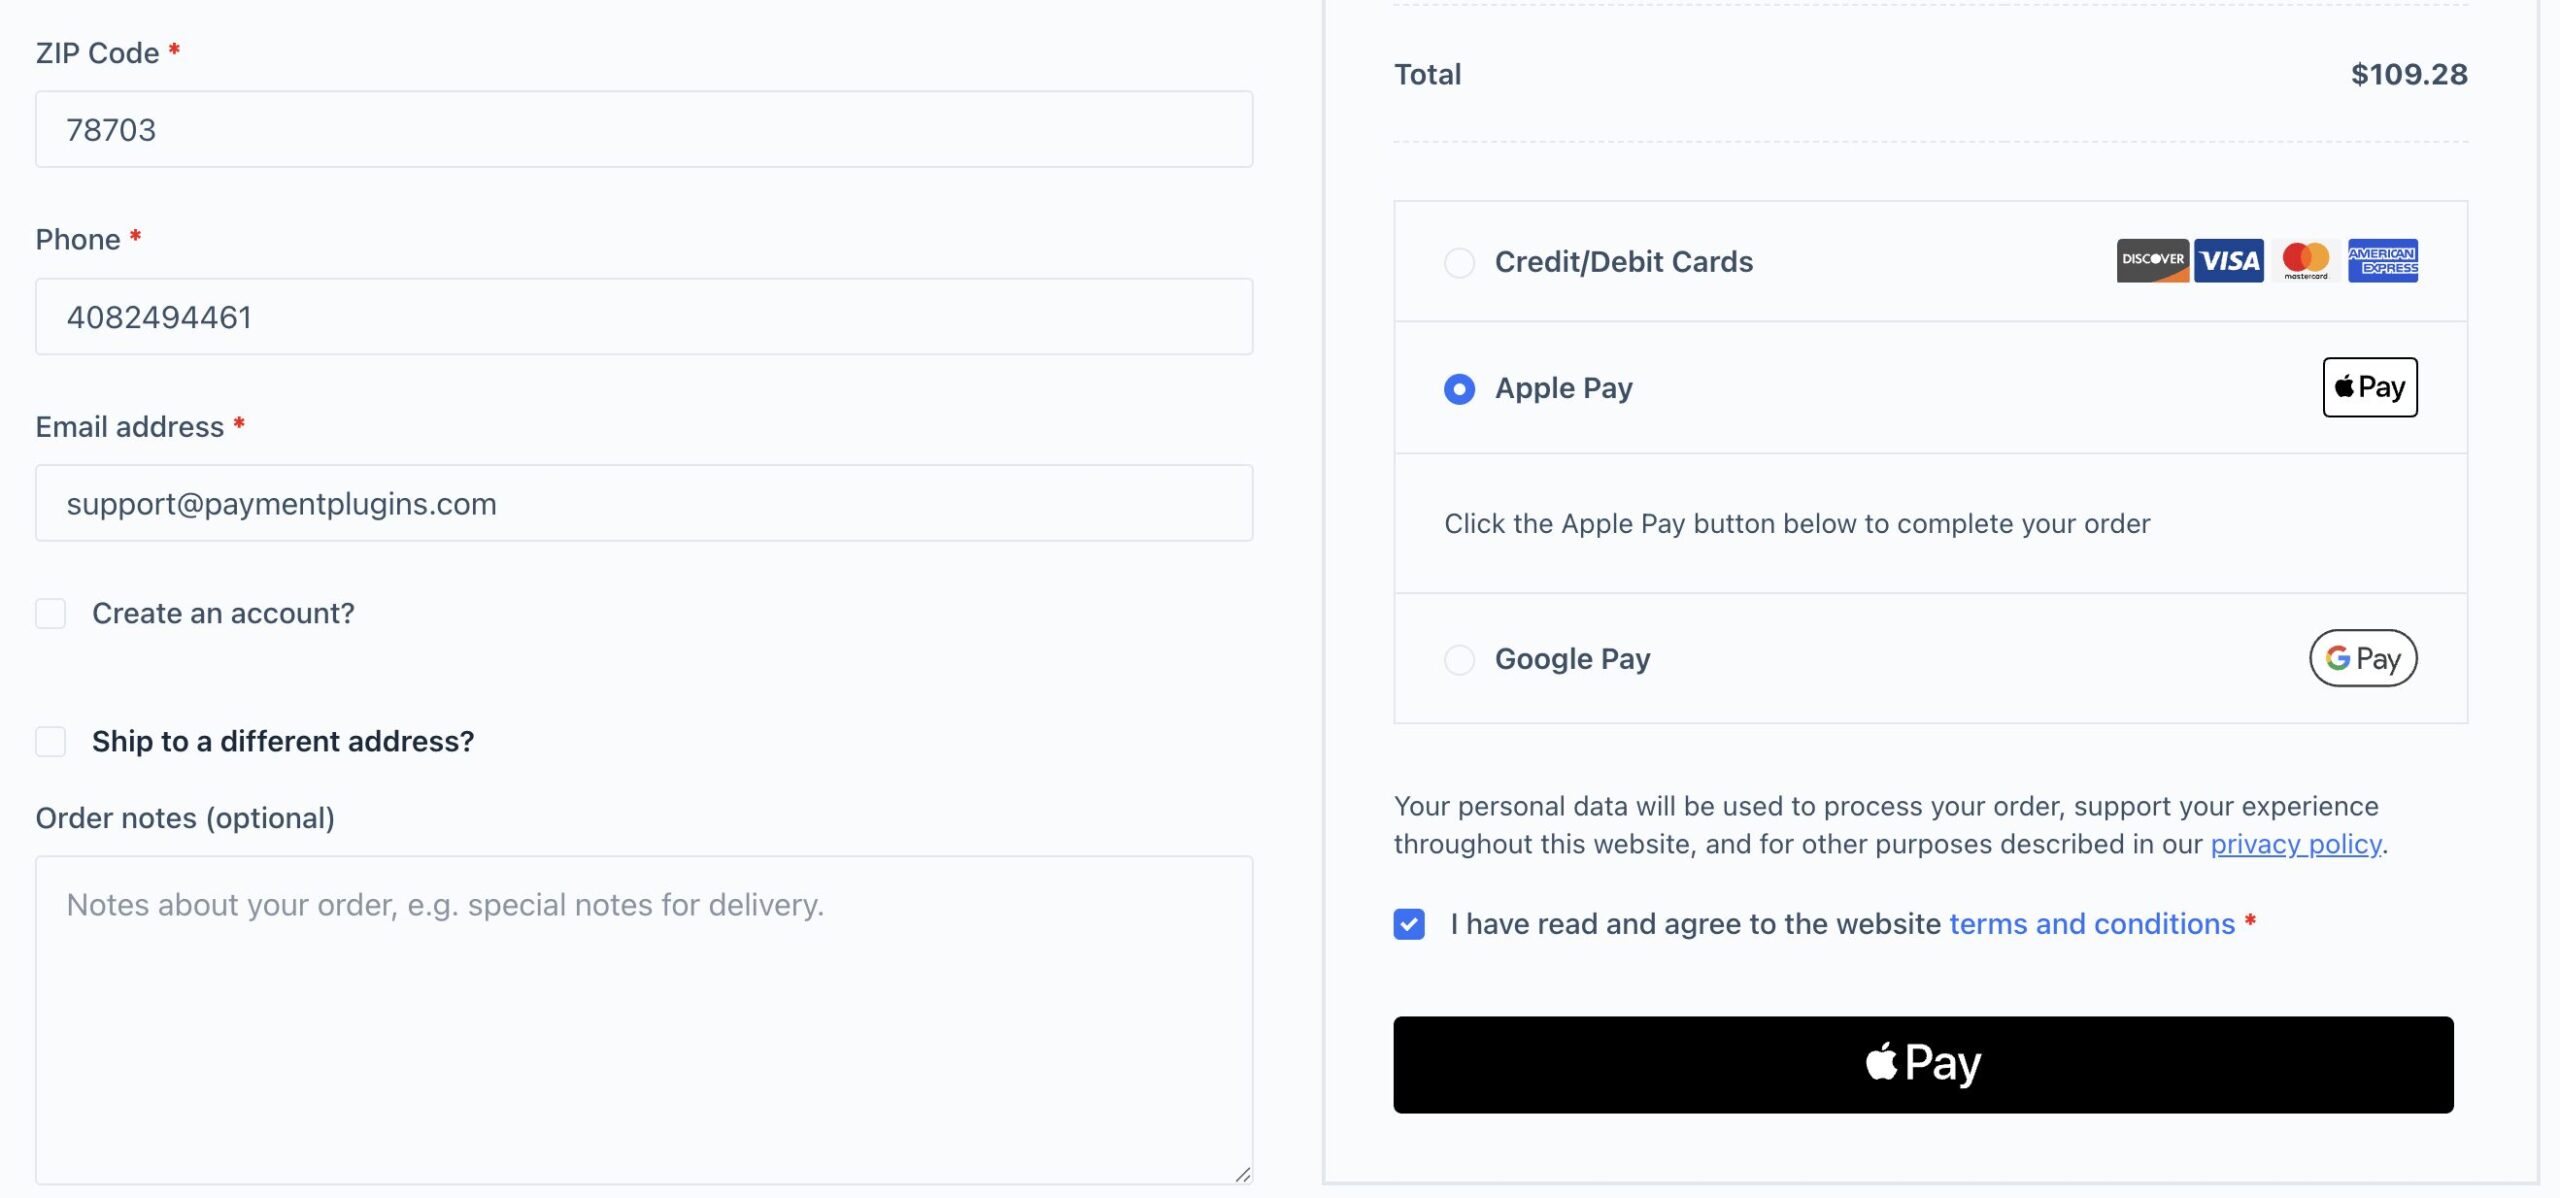
Google Pay No Longer Requires a Merchant ID or Google Approval
For a long time the plugin offered two ways to accept Google Pay. The Payment Request Gateway used Stripe’s built-in Google Pay support, which required no setup at all — but it had limitations. Browser support was restricted and it lacked some of the more robust features merchants needed. The Google Pay Gateway, on the other hand, used a direct Google Pay integration that was far more capable, but came with a manual setup process: submit an application to Google, provide screenshots of your checkout, wait for approval, receive a Merchant ID, and enter it manually into the plugin.
Stripe’s latest Google Pay integration changes this entirely. It now behaves exactly like the direct Google Pay integration — full browser support, all the features merchants expect — but without any of the manual setup. There is no application process, no screenshots, no Merchant ID, and no waiting for approval. If your Stripe account supports Google Pay, it works out of the box.
This means the Payment Request Gateway is no longer needed. In 4.0.0 it has been deprecated and replaced by the Google Pay gateway, and this happens automatically on update — there is nothing merchants need to do. Any existing subscriptions or recurring payments tied to the Payment Request Gateway will continue to process without interruption through the Google Pay gateway. All future Google Pay purchases will go through the new Google Pay gateway. Existing merchants will not notice any difference at checkout.
New Payment Section Option For Express Payment Methods
Merchants have always been able to control whether Apple Pay and Google Pay appear in the express checkout section at the top of the page. What wasn’t possible — and what merchants have been asking for — was controlling whether those same payment methods also appear in the payment methods list below. On the checkout shortcode, Apple Pay and Google Pay would always show up there automatically, with no way to turn it off.
In version 4.0.0, merchants can independently control where Apple Pay and Google Pay appear — in the express row, in the payment method list, or in both. And it works the same way whether you’re using the classic checkout shortcode or the WooCommerce checkout block.
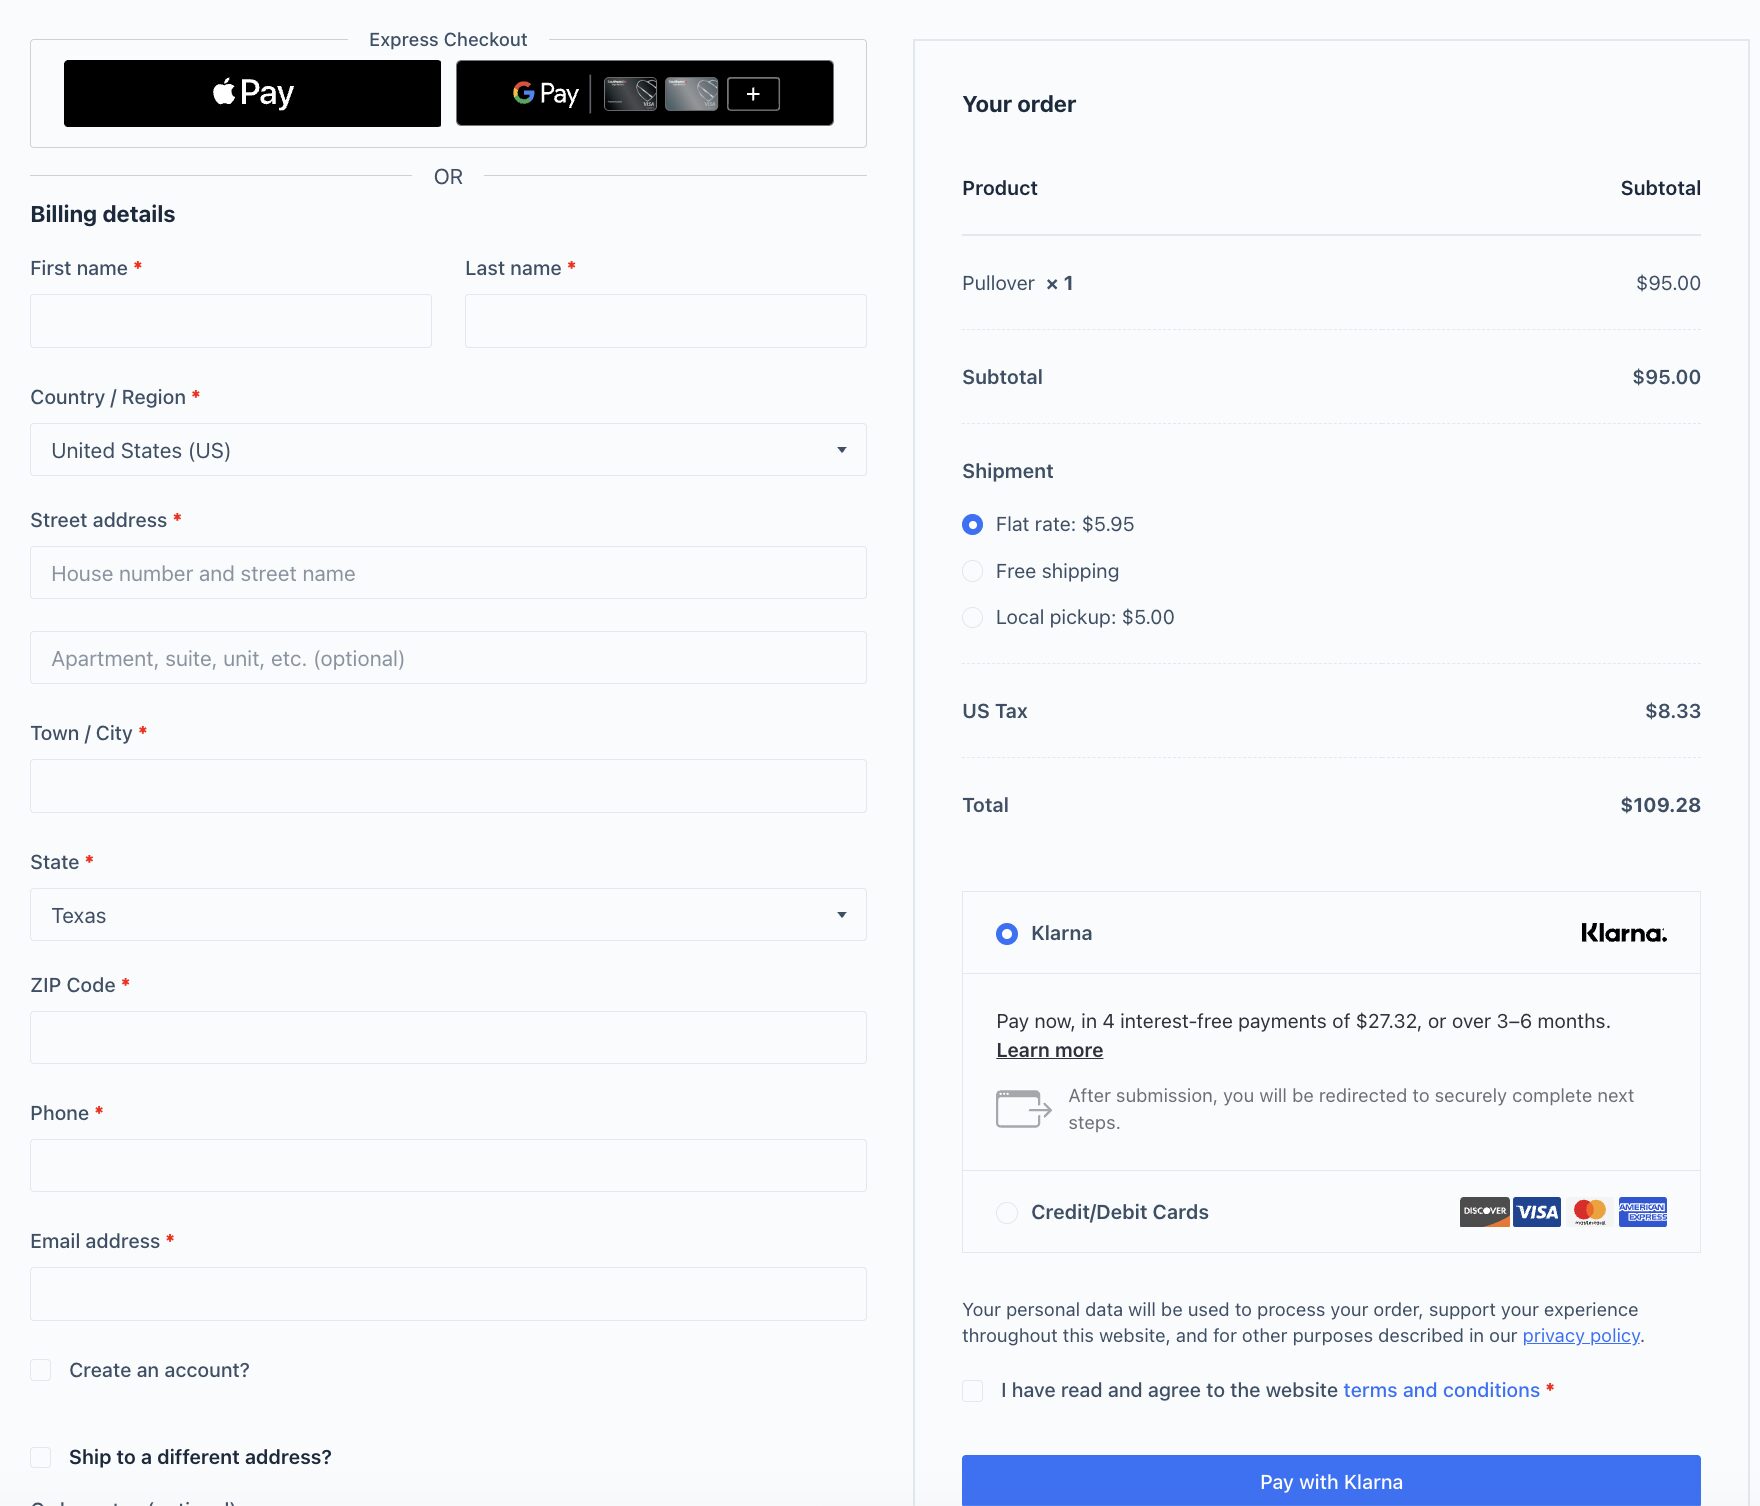
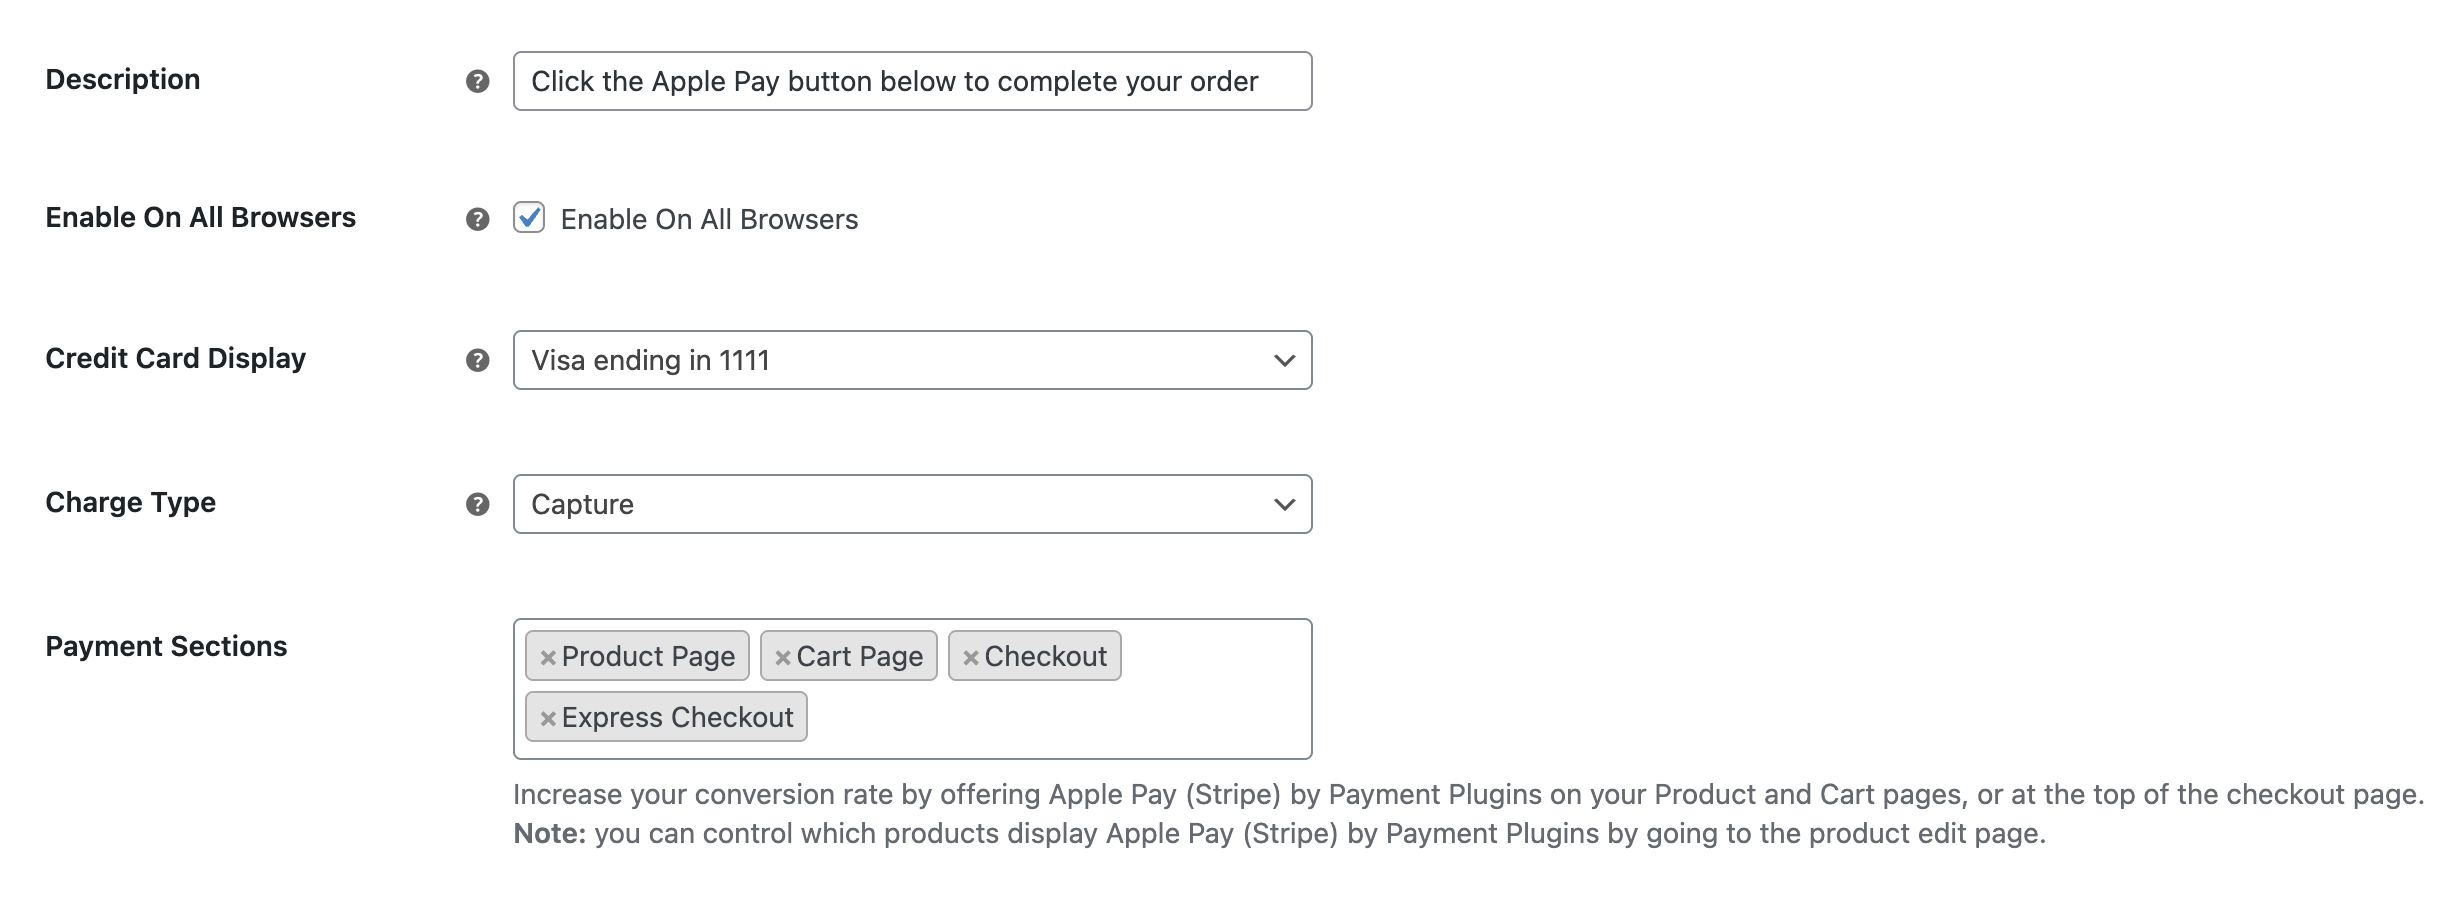
Why does this matter? Not all merchant sites are the same; some merchants might want to only offer Apple Pay and Google Pay as express payment options whereas other merchants might want an express checkout section and for those options to appear in the standard payment method section.
To our knowledge, no other Stripe plugin for WooCommerce offers this level of control over express payment method placement. It was one of the most-requested features we hadn’t been able to ship cleanly until the new architecture made it straightforward.
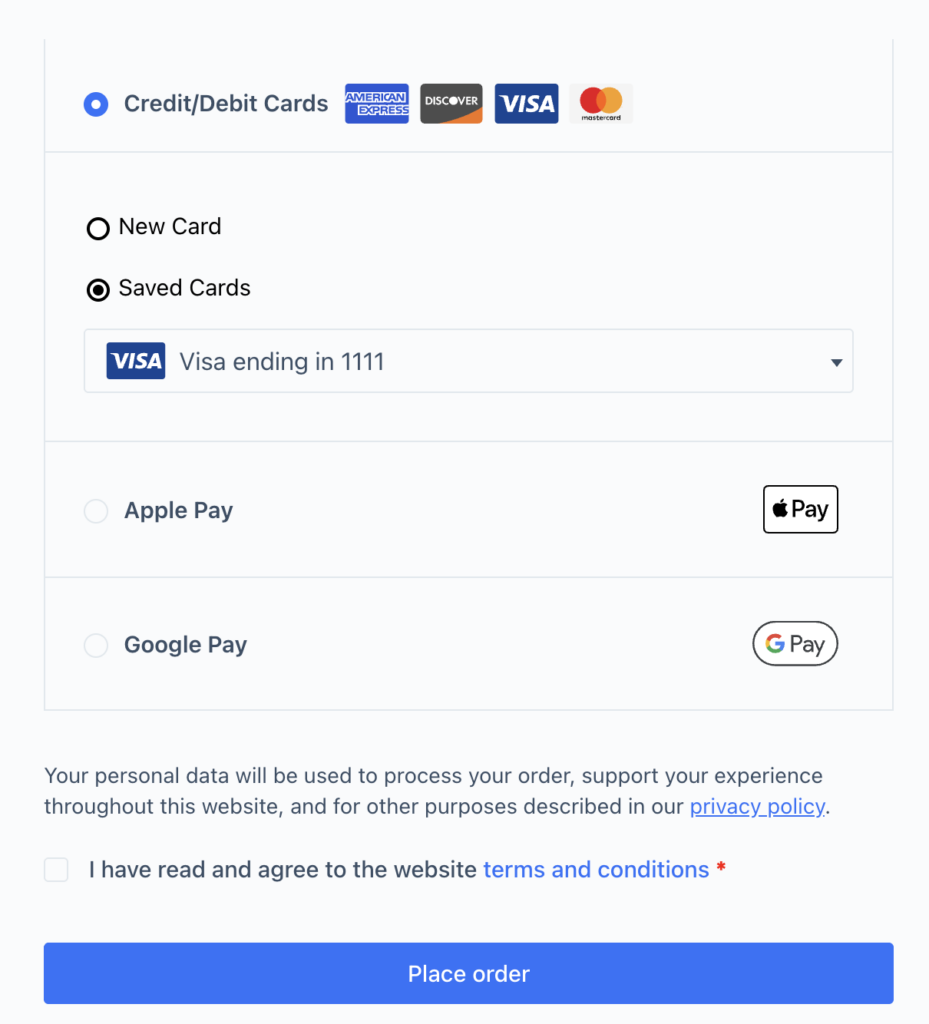
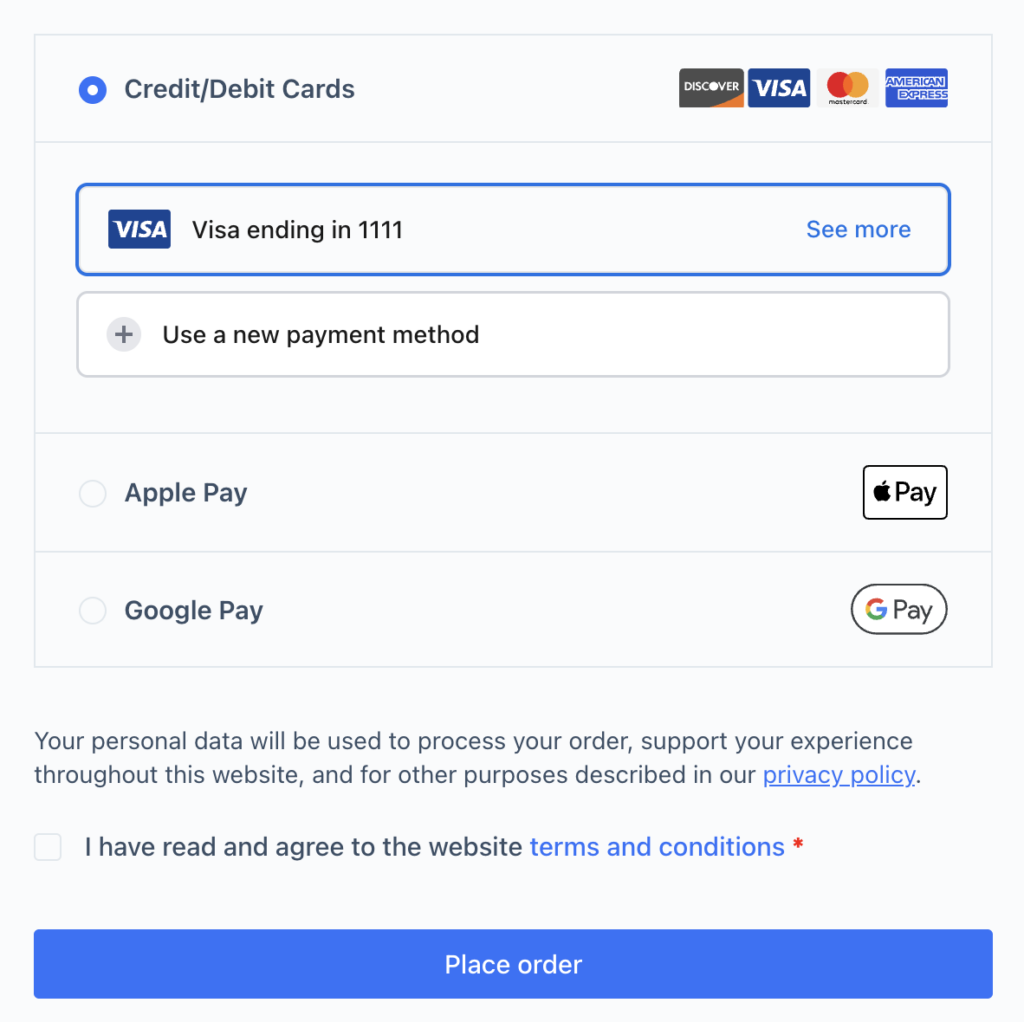
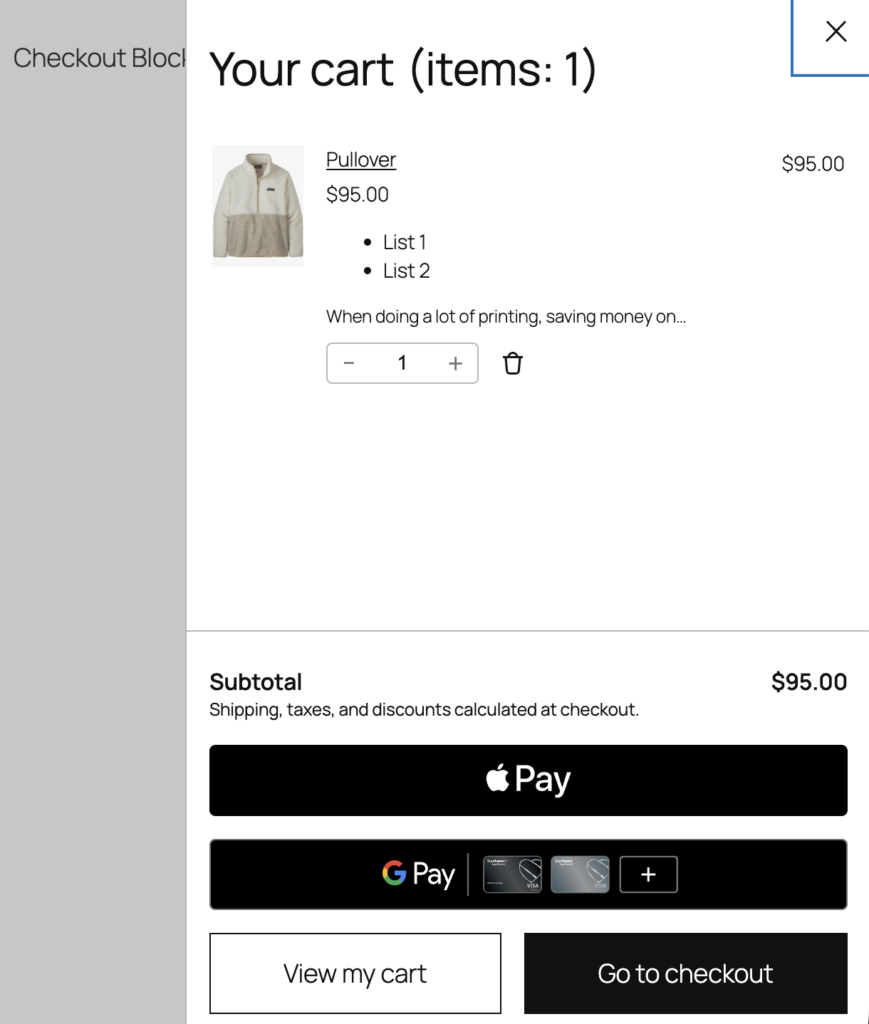
Customers With Saved Cards Get a Cleaner Experience
For returning customers who’ve saved multiple payment methods, the previous UI used a nested dropdown inside the Credit/Debit Cards section — a radio button that revealed another set of choices inside it. It worked, but the nested structure could be confusing, and it made the checkout feel heavier than it needed to be.
The new design replaces that pattern entirely. Saved cards are now presented as clean, individual rows at the same level as other payment options. By default, the customer’s most recently used card is shown with a See more link to expand the full list — keeping things tidy without hiding anything.


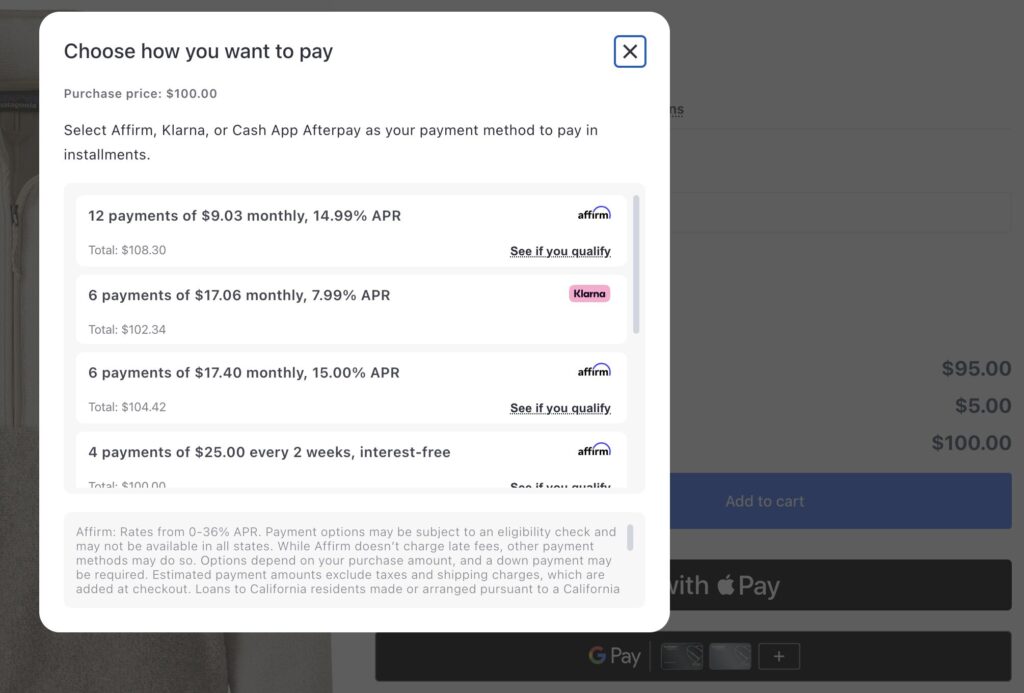
Buy Now Pay Later Messaging Updates
Buy Now Pay Later options — Klarna, Afterpay, and Affirm — show promotional messaging across your store to remind customers that flexible payment options are available. In earlier versions, each payment method had its own separate messaging element, which created redundancy and made it harder to keep everything in sync.

Version 4.0.0 uses a single unified messaging element that renders all supported BNPL methods together, which is how Stripe designed the new API to work. The result is cleaner messaging that’s easier to manage and understand.

BNPL messaging also now integrates with popular Product Add-On plugins. When a customer adds a product add-on the installment messaging updates dynamically to reflect the new total. So customers always see an accurate “pay as low as $X/month” figure, not one that was calculated before they configured their product.
The two screenshots below show this in action. The product is displayed with two different add-ons selected — and the BNPL messaging updates automatically each time to reflect the new grand total.

Supported add-on plugins include WooCommerce Product Add-Ons, Advanced Product Fields for WooCommerce, Extra Product Options & Add-Ons, and others.
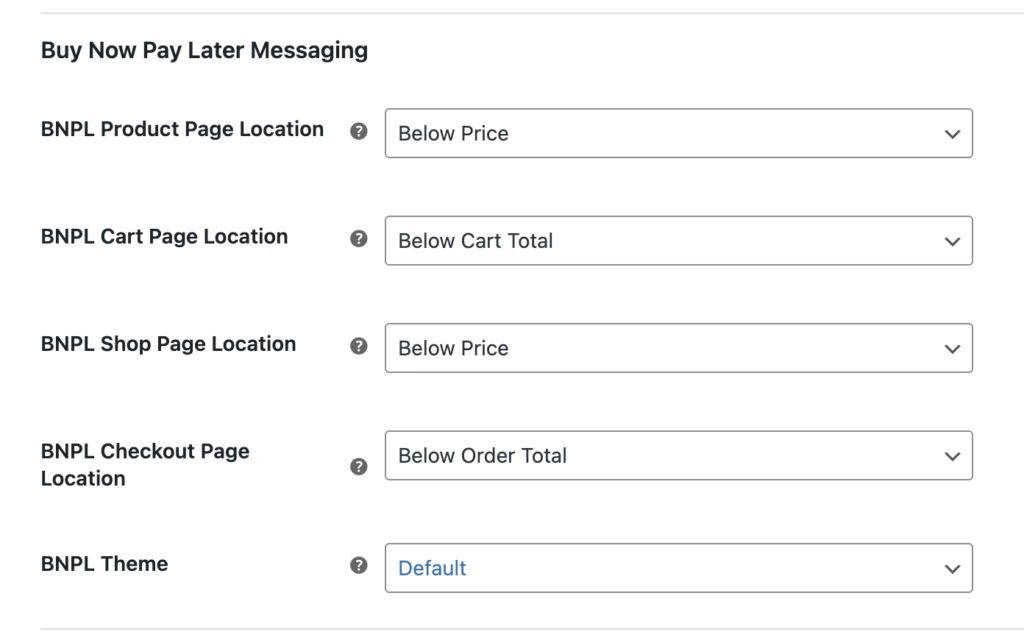
Where You Manage BNPL Messaging has Moved
In version 4.0.0, we have moved the BNPL location settings to the Advanced Settings page. This makes sense because now that messaging has been unified, it doesn’t need to be individually controlled on the Affirm, Afterpay, or Klarna settings pages.
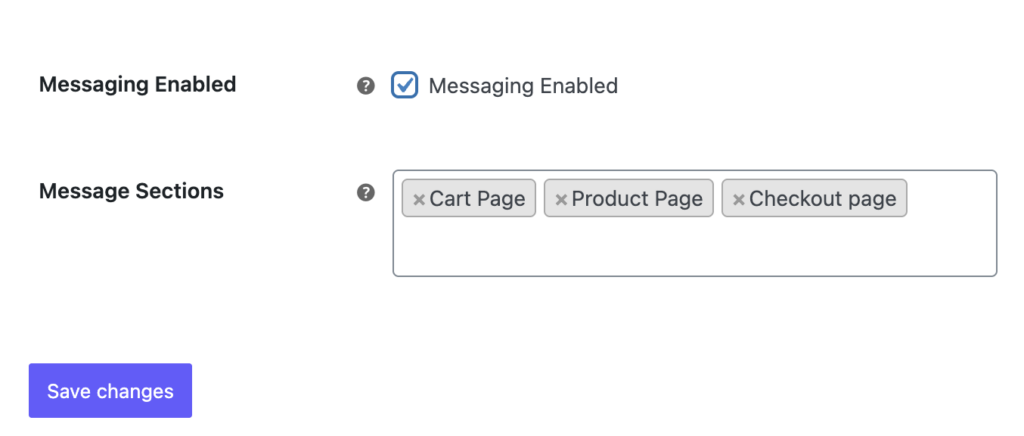
Enabling BNPL Messaging
To enable Affirm, Afterpay, or Klarna messaging, you still manage that on each settings page. For example, to enable Affirm messaging, navigate to the Affirm Settings page, /wp-admin/admin.php?page=wc-settings&tab=checkout§ion=stripe_affirm, and scroll to the Messaging Enabled option. Select the checkbox and then configure the pages where you want Affirm messaging to display.
Performance Improvements
Prior to 4.0.0, the plugin used a mixture of modern webpack-built scripts and older ES5 scripts written in the traditional prototype pattern. Having both approaches in the same codebase was not ideal — combining them resulted in larger than necessary script files and made it harder to optimize how scripts were delivered to the browser.
By rewriting all of the plugin’s Javascript code we have been able to take advantage of optimizations not previously available. This has resulted in significant performance improvements on customer facing pages where the Stripe plugin is enabled.
| Page | Before | After | Reduction |
|---|---|---|---|
| Checkout | 194 kB | 95.6 kB | 51% |
| Product Page | 153.6 kB | 94.3 kB | 39% |
| Cart Page | 145.5 kB | 92.3 kB | 37% |
WooCommerce Mini Cart Support
In version 10.4.0 of WooCommerce, the Woo team added a new mini cart that taps into the WordPress Interactivity API. We have now added full support for this new cart feature in the 4.0.0 release. You can read more about the new mini cart here.
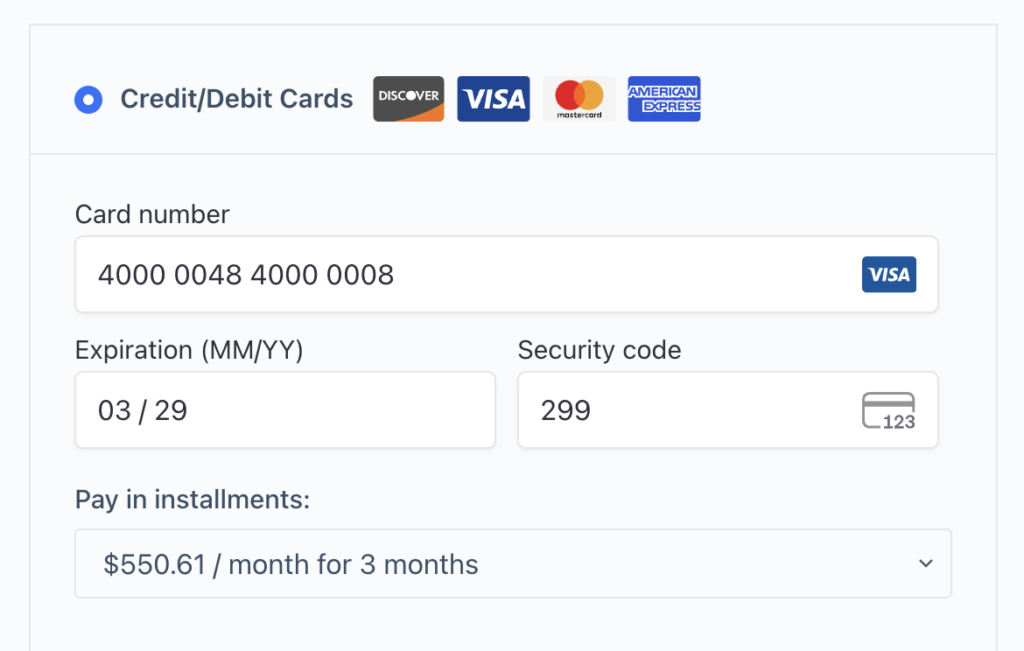
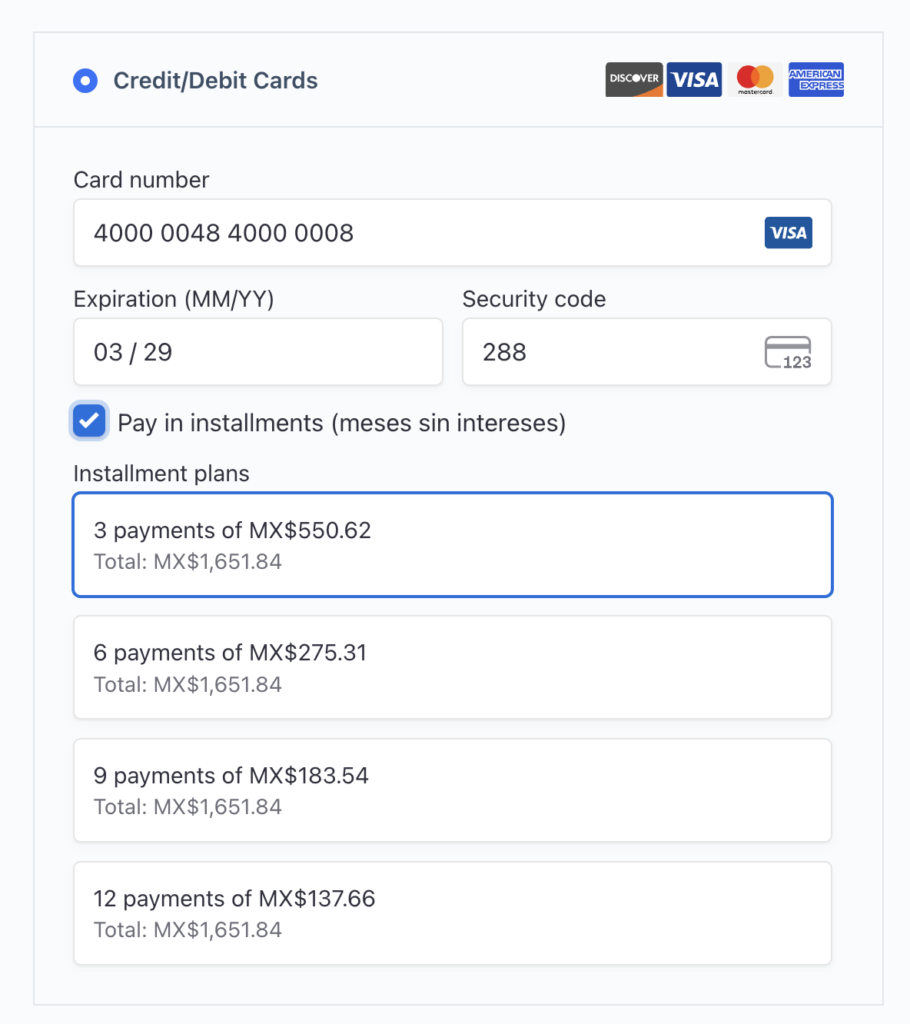
Installments Now Render Natively Through Stripe
For merchants selling in Mexico or Brazil, the plugin has long supported installment payments — letting customers split their purchase into monthly payments directly at checkout. Previously, this required a custom-built dropdown that the plugin maintained entirely on its own: custom HTML, custom styling that had to work across every theme, and complex logic to determine when installment plans were available and how to fetch them. Keeping that UI consistent and conflict-free across the wide variety of WooCommerce themes out there was an ongoing challenge.
In 4.0.0, all of that custom code is gone. Installment options are now rendered natively inside Stripe’s own Payment Element iframe, which means Stripe handles the display, the plan fetching, and the UI. Because it renders inside the Stripe iframe, there are no styling conflicts with themes — it just works, regardless of how your checkout page is styled.
This Is a Release Candidate — We Need Your Help
Version 4.0.0-rc.2 is ready for testing. We’re holding it back from the main WordPress.org listing for now to give merchants time to verify compatibility with their themes, other plugins, and any custom code before we push it to 100,000+ sites.
If you run into anything unexpected, please create an issue on the Github Issue Tracker page. Your testing directly shapes the quality of the final release.